August 29, 2012

Cake Batter Popcorn

If you've been to any ice cream places lately I'm sure you have seen and maybe even tried cake batter ice cream. It's very popular and although we don't make outings to the ice cream parlor often I have to admit it is quite tasty.


I thought I was being really creative and inventive when I thought to make cake batter popcorn. Turns out there are already many recipes out there to follow to make this, however, all of them that I read used shortening (gross!) and white chocolate along with the cake mix. Since I can't bring myself to use shortening I knew I had to come up with something else.

My mom makes the most delicious caramel corn so I decided to modify her recipe to make it taste like cake batter but still be perfectly coated and crunchy!!


I have a serious problem with GMO (genetically modified organism) anything and since corn is something like 90% (don't quote me on the percentage) genetically modified these days I only buy organic non-GMO popcorn. You choose but be aware that unfortunately most corn is modified in some way.

Cake Batter Popcorn
1 stick butter
1/2 c. sugar
1 teaspoon salt
1 c. light corn syrup
1 c. yellow cake mix
1/2 t. baking soda
1 1/2 t. vanilla extract

Preheat the oven to 250 degrees F.

Pop 4 quarts (16 cups) of popcorn and divide equally between two lightly buttered 9 x 13 pans making sure there are no kernels left.  I use my hands after popping the corn and put it in the baking pans leaving the un-popped kernels in the bottom of the bowl. It's no fun to break your tooth on a popcorn kernel so take your time doing this! (I think using an air popper is the easiest way to make popcorn but if you don't have one you can make it on your stove in a large stock pot with a little oil.)

Combine the butter, sugar, salt and corn syrup (try to get corn syrup that does not have HFCS) in a medium saucepan. Bring to a boil over medium heat, stirring enough to blend. Once the mixture begins to boil, boil for 5 minutes on medium heat stirring constantly.

Remove from the heat, and stir in the baking soda, cake mix and vanilla. The mixture will become light and foamy.

Immediately pour cake batter sauce over the popcorn in the pans, and stir to coat.

Bake for 1 hour, removing the pans, and giving them each a good stir every 15 minutes. After 30 minutes shake on some sprinkles for added fun! If you do this any sooner the colors will run making a messy looking popcorn and who wants that?!

After one hour remove pans from the oven and continue to gently stir the popcorn until it cools enough so it doesn't stay in big clumps.

Serve to anyone who loves popcorn or cake batter!

August 28, 2012

No-Sew 10 Minute T-Shirt Bag

Did you know that about 100 billion plastic bags are used annually in the US alone and only about 2% of them are recycled? Check it out at www.droptheplasticbag.org.

It's a scary statistic but we can all do small things to help our earth! Using reusable bags or totes is a very easy way to do your part. It is a great alternative to buying reusable bags or taking merchandise home in plastic bags from stores and much more fashionable! They are durable and will last a long time.

Everyone at some time or another has probably had an old t-shirt that they didn't need or like anymore. Instead of tossing it make it into a reusable tote in about 10 minutes.

All you will need is an old t-shirt and a pair of scissors.

You can use a short or a long sleeved t-shirt. It won't matter since you will be cutting the sleeves off anyway.

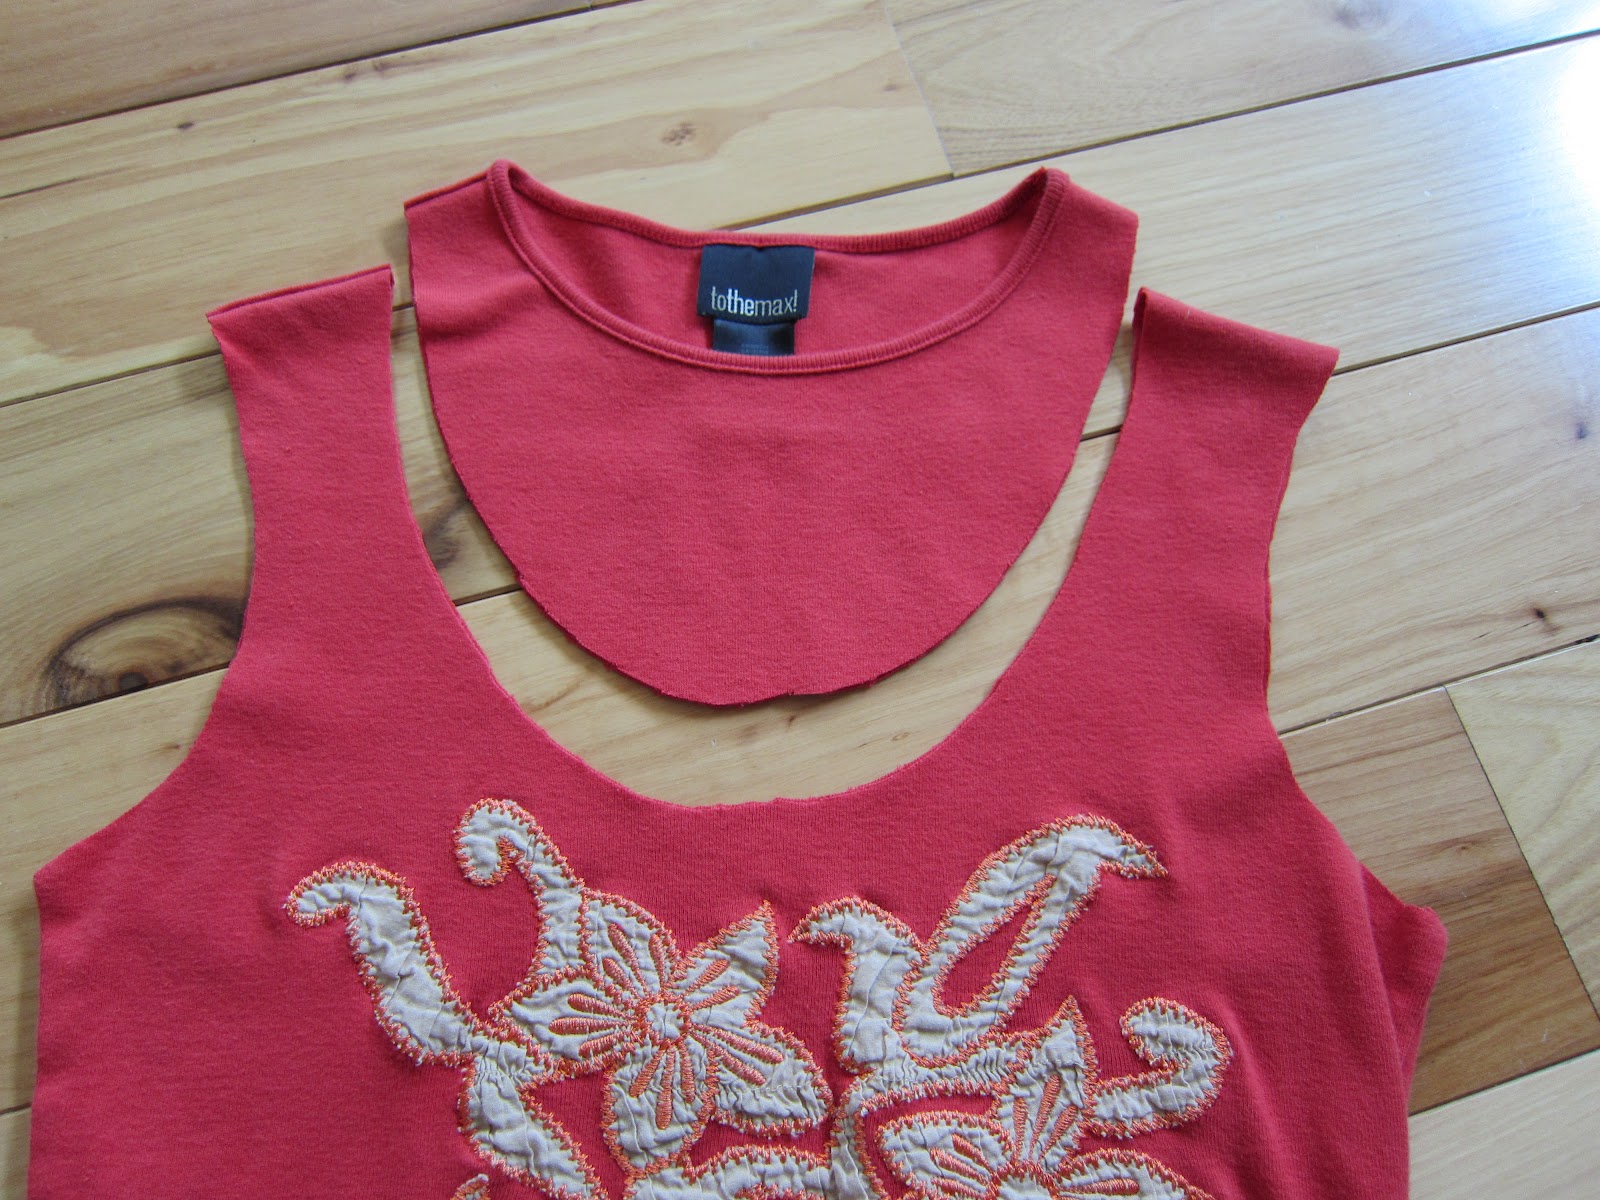
Lay your t-shirt out on a flat work surface. Using a sharp pair of scissors cut the sleeves off of your t-shirt.

You can use a large bowl and draw around it on your fabric to get a nice rounded scoop shape or just eyeball it and cut the scoop. I just eyeballed it.


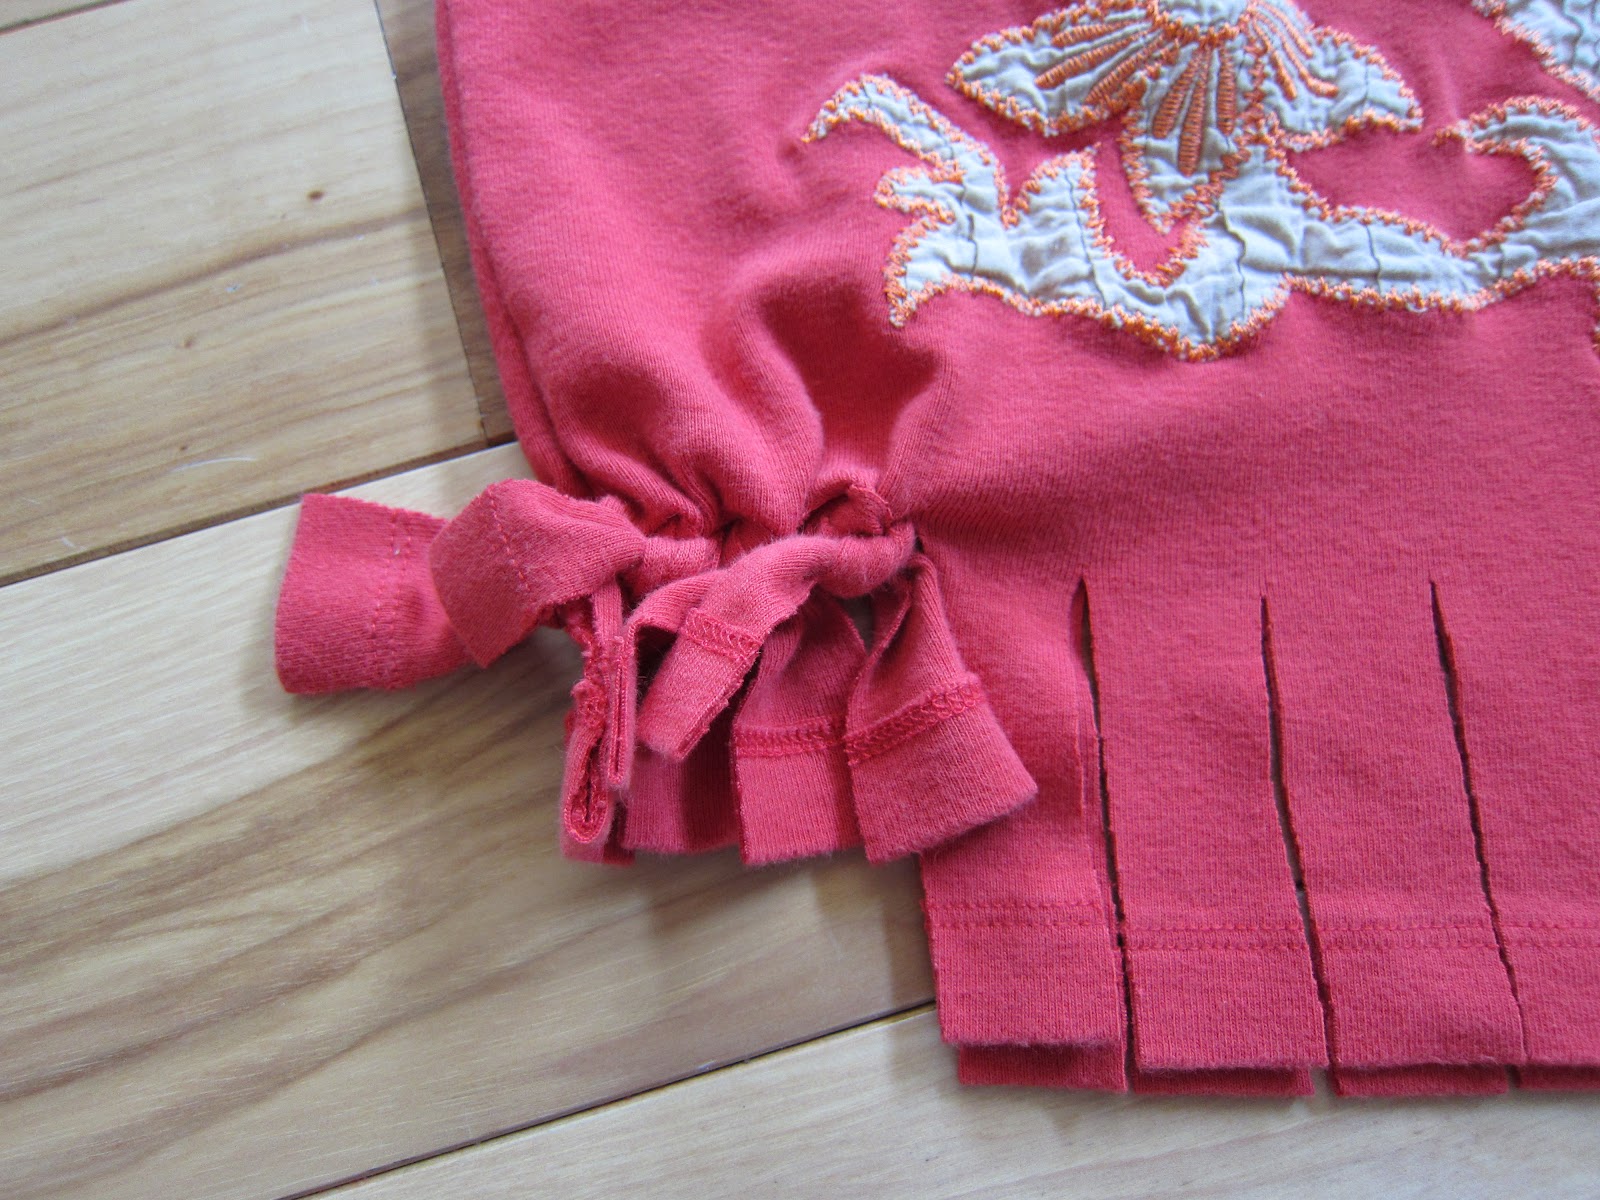
At the bottom of the shirt cut slits about every inch through both layers (length will depend on the size of the shirt so you will have to make the call) long enough that you will be able to tie them twice. Remember the shirt will stretch with weight so try to make sure your tote isn't going to hang to your feet with filled with goodies!

Keep the slits lined up and starting with one end tie the aligning front and back pieces together in double knots until you have done the entire row.


If you don't want the knots to show you can tie them on the inside for a less fringed look.

This step is optional but I chose to cut small strips of extra fabric and tie small knots on the tops of the handles for a more decorative look.


The tote is finished and ready to use! Go shopping!

August 27, 2012

Raw Chocolate Peanut Butter Brownies

Raw, vegan, paleo, chewy, rich, sugar free, and healthy chocolate peanut butter brownies! Who just cringed?? If you did you might want to think twice and actually try this dessert. Your brain won't know the difference in taste only texture which is still quite delightful.

Your body will enjoy protein, omega-3 fatty acids and antioxidants by eating this dessert! Yay!


I made these on a day that the temperature was 86 degrees and the humidity was 78%. Not exactly a day you want to scorch up the kitchen by turning on the oven to make brownies. All you need for these is a nine inch square pan and a food processor.

These brownies are simple and delicious and will definitely please and satisfy the kiddos! When I was making them my son walked into the kitchen and said, "Yum, I smell brownies!"

Raw Chocolate Peanut Butter Brownies

Brownie Layer
1 c. walnuts
1/2 c. almonds
2 T. chia seeds
2 T. shredded unsweetened coconut
1 c. pitted dates
1 c. raisins
2 t. vanilla extract
1/4 c. cocoa powder
pinch of salt

In the bowl of a food processor add nuts and grind until crumbly. Add chia seeds and coconut and whiz to incorporate. Transfer mixture to a bowl. Without cleaning the food processor add dates and raisins. Grind until texture is like a thick paste. Add nut mixture to date mixture in the food processor and add cocoa powder, vanilla and salt. Grind again until mixture can hold together when pinched. Divide mixture in half and set aside.

Peanut Butter Layer
1/2 c. almonds
1/4 c. walnuts
3/4 c. raisins
1/2 c. oatmeal
1/2 c. peanut butter (no sugar please)

Grind nuts, raisins and oatmeal in the food processor until crumbly. Add peanut butter and whiz until mixture comes together and can hold its shape. Set aside.

Line a nine inch square baking dish with parchment paper. Using half of the brownie mixture press firmly into the bottom of the pan. Next press in the peanut butter layer. Add the second half of the brownie mixture on the top and press again.

Gently lift parchment paper out of the pan onto a cutting board. Using a sharp knife cut brownies into 16 equal squares.

Eat and enjoy! No waiting for the brownies to bake!

Store in an airtight container layering with parchment paper so brownies don't stick together.