September 13, 2013

Fresh Raspberry Sherbet

Picking fresh raspberries is one of my favorite things to do. It is calming, a good stress reliever and a great way to start the day. Especially when the leaves are still wet with dew and the berries glisten in the morning sunshine.

Conveniently my 91 year old neighbor has an enormous organic raspberry patch that she lets me pick all of her raspberries out of. She is moving soon and I will be sad to see her go. Somehow I'm going to have to convince the new neighbors to let me pick raspberries next year! I have collected over six pounds so far and after my entire family gorges themselves on fresh raspberries I freeze what's left.

So far I have made raspberry scones, fresh puree for pancakes and waffles, a vinaigrette and raspberry applesauce. Since sherbet is my absolute favorite kind of ice cream raspberry sherbet was the next obvious choice for using up the raspberries. And a good one I might add!!


Before you start on the sherbet you will want to make the puree. You can use fresh or frozen berries. I used frozen berries that weren't prime to eat fresh. Picked, of course, out of the raspberry patch!
 
There are several ways to make puree:
If you are using fresh berries just blend them and strain them through a fine mesh strainer to remove the seeds.
 
If you are using frozen berries use the following steps:
1. In a medium saucepan cook 12 ounces of frozen berries and 1/4 cup water over medium heat until berries start to release their juices.
2. Using a spatula, wooden spoon or veggie masher - mash the berries.
3. Remove berries from heat and blend mixture with an immersion blender until smooth.
4. Line a bowl with a fine mesh strainer and pour mixture into strainer.
5. Gently shake the strainer until all you have left are seeds. Discard seeds. You should have approximately 1 1/2 cups of puree. If you have a bit extra drink it up or pour
over pancakes in the morning!


Making homemade raspberry sherbet is actually very simple compared to proper ice cream. You don't need to cook anything which is a bonus in saving time!

Fresh Raspberry Sherbet
1 1/2 c. raspberry puree
1 c. heavy cream
1/2 c. milk
1/2 c. sugar
1 t. fresh lemon juice (optional)

In a medium mixing bowl combine all ingredients. Stir well until the sugar is dissolved.
Cover bowl and refrigerate mixture for 3-4 hours before freezing in an ice cream machine.

Once mixture has been cooled freeze according to machine instructions. Basically, you just need to make sure your freezer bowl is completely frozen and you don't overfill the bowl with the sherbet mixture!
 
In my machine it took about 15 minutes to get a soft serve consistency. It is very good this way and irresistible to try! Place in a airtight container and freeze longer for a harder consistency - more like traditional sherbet. Eat and enjoy with more fresh raspberries!

June 22, 2013

Homemade Sweet Tarts Candy

Sweet and sour all wrapped up in one tiny magnificent bite!

That would be my definition of homemade sweet tarts and making them was so much easier than I ever imagined. They don't have that semi-shiny coating on the outside (because I didn't want to put food in a rock tumbler!!!) but the flavor and texture are the same!!

homemade sweet tarts candy

Homemade Sweet Tarts
1/4 c. clear soda (Blue Sky, Cream Soda, Sierra Mist, 7-UP)
3/4 t. gelatin
3-4 c. powdered sugar, plus more for rolling
2 t. citric acid
Flavored extracts
Food coloring
1/2 t. each of lemon and orange zest - optional

In a small non-reactive bowl combine gelatin and soda. After about 5 minutes, set the bowl over a pot of simmering water to dissolve the gelatin completely - until you can't see any granules. Remove from heat.

Using a hand or stand mixer - mix 1/2 c. powdered sugar and the citric acid into the gelatin mixture. Keep adding the powdered sugar 1/2 cup at a time until you have stiff fondant-like dough. It will be somewhat sticky. Turn dough out onto a work surface covered with powdered sugar. Knead until dough is less sticky and can be easily rolled with a rolling pin. In this particular recipe more powdered sugar is better than less so you don't end up with a chewy sweet tart, unless you like them chewy!

This is the basic recipe. Now you can add what ever flavorings and colors you wish.

Once the basic dough recipe is finished divide dough into as many equal pieces as flavorings you have to use. I divided mine into four equal pieces so I chose four extracts (and matching food colorings) - Lemon, Orange, Strawberry and Blueberry.

Starting with one piece of dough make a well in the middle and add:
1/4 t. of flavoring/extract
food coloring - to desired color
1/2 t. zest - optional - I used this only in the orange and lemon varieties.

Knead until cohesive. Set aside while you mix the other colors and flavors.

Starting with one color/flavor of dough roll out to 1/4 inch thickness. I used 1/4 inch square dowels as guides. It makes the drying more consistent this way.

Using a small round cookie cutter (about 1/2 inch in diameter), cut out as many circles as you can and transfer cut-outs to a baking sheet to dry. Collect scraps and re-roll and cut continuing until dough is gone.

Drying may take a few days so be patient. If you have a food dehydrator you can speed the drying process significantly! Don't try to put them in the oven, however, even on warm. They will not dry smooth and will have bumps and indents. Trust me I tried it once!!!

Roll sweet tarts in candy wrappers if desired or store in an airtight container for up to three months. Don't worry they will be gone before that! They also make great party snacks or a good addition to a goodie bag. They are mess free!

June 20, 2013

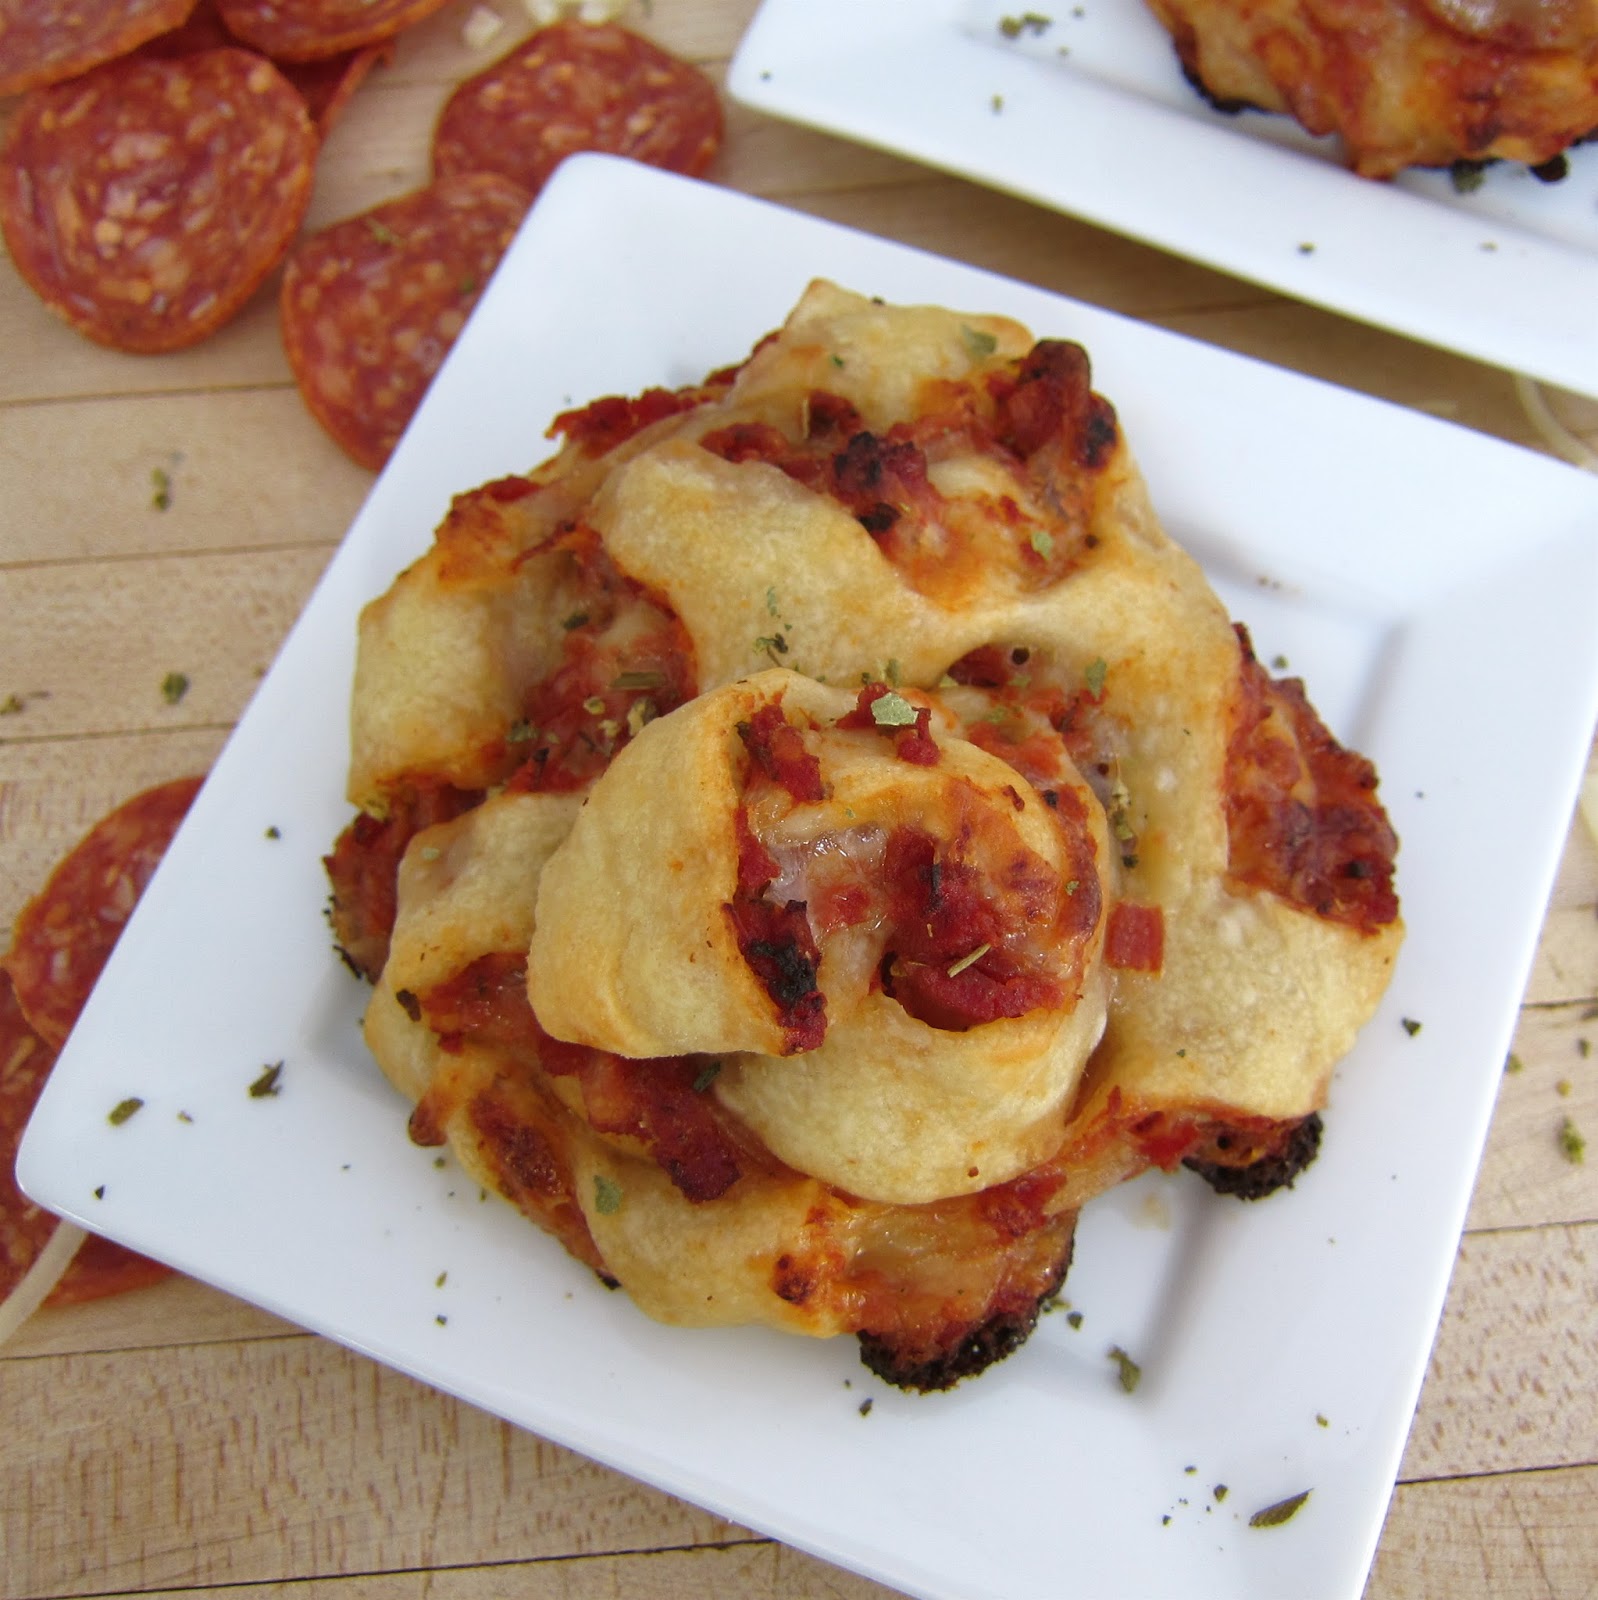
Pepperoni Pizza Twists

For those of us who are pizza-dough-tossing challenged this is a fun and easy way to dress up pizza and make it taste as great as the real thing without getting covered in flour and ending up with pizza dough in our hair!!! How do they make it look so easy?!

The bottom is crispy and charred from the melted cheese and the top is nice and crunchy while the middle is still hot and chewy. The perfect combination for great pizza!


Pizza Dough
1 - 1/4-ounce envelope dry active yeast
1 c. water
2 1/2-3 c. flour, plus more for dusting
1 t. salt
Olive oil, for bowl

Dissolve yeast in warm water (105-115 degrees F) in a glass measuring cup and let stand for 5 minutes.

In the bowl of a stand mixer fitted with hook attachment add yeast mixture and stir in 1 1/2 cups flour and the salt, mixing until smooth. Add flour 1/2 cup at a time until dough comes away from bowl but is still sticky.

Turn dough out onto a lightly floured work surface and continue kneading until dough is no longer sticky and is smooth.

Shape dough into a ball and transfer to a lightly oiled bowl; turn to coat. Cover with plastic, and let rise in a warm place until it doubles or place in a proofer and let rise 30-45 minutes.

Preheat a pizza stone in a 500 degree F. oven for one hour.

Divide dough into six equal pieces. Shred desired cheese and cut desired toppings into small pieces. This will make it easier once it's time to slice the dough. I just used pepperoni and cheeses for mine. Classic and easy!


On a lightly floured work surface stretch dough into a 10-12 inch long oval or rectangle (about 3-4 inches wide). You can use a rolling pin but I found it easy to just stretch the dough with my hands. If you get a hole just pinch in closed.

Spread pizza sauce on the dough and sprinkle with cheese and toppings.

Using a table knife make diagonal slices in the dough. Diagonal is very important. If you make them straight the toppings will fall out when you roll up the dough.

Starting at one end of the dough start rolling it up until you have a long thin roll.
It's okay if pizza toppings are falling out.


Now, starting at one end of the roll start twisting it up like a snail mounding it as you roll. Repeat with remaining pieces of dough. Transfer all to pizza stone.


Reduce heat to 400 degrees F and bake 10-15 minutes or until top is golden brown and you can hear the cheese sizzling. Serve piping hot!