Showing posts with label dessert. Show all posts

February 19, 2013

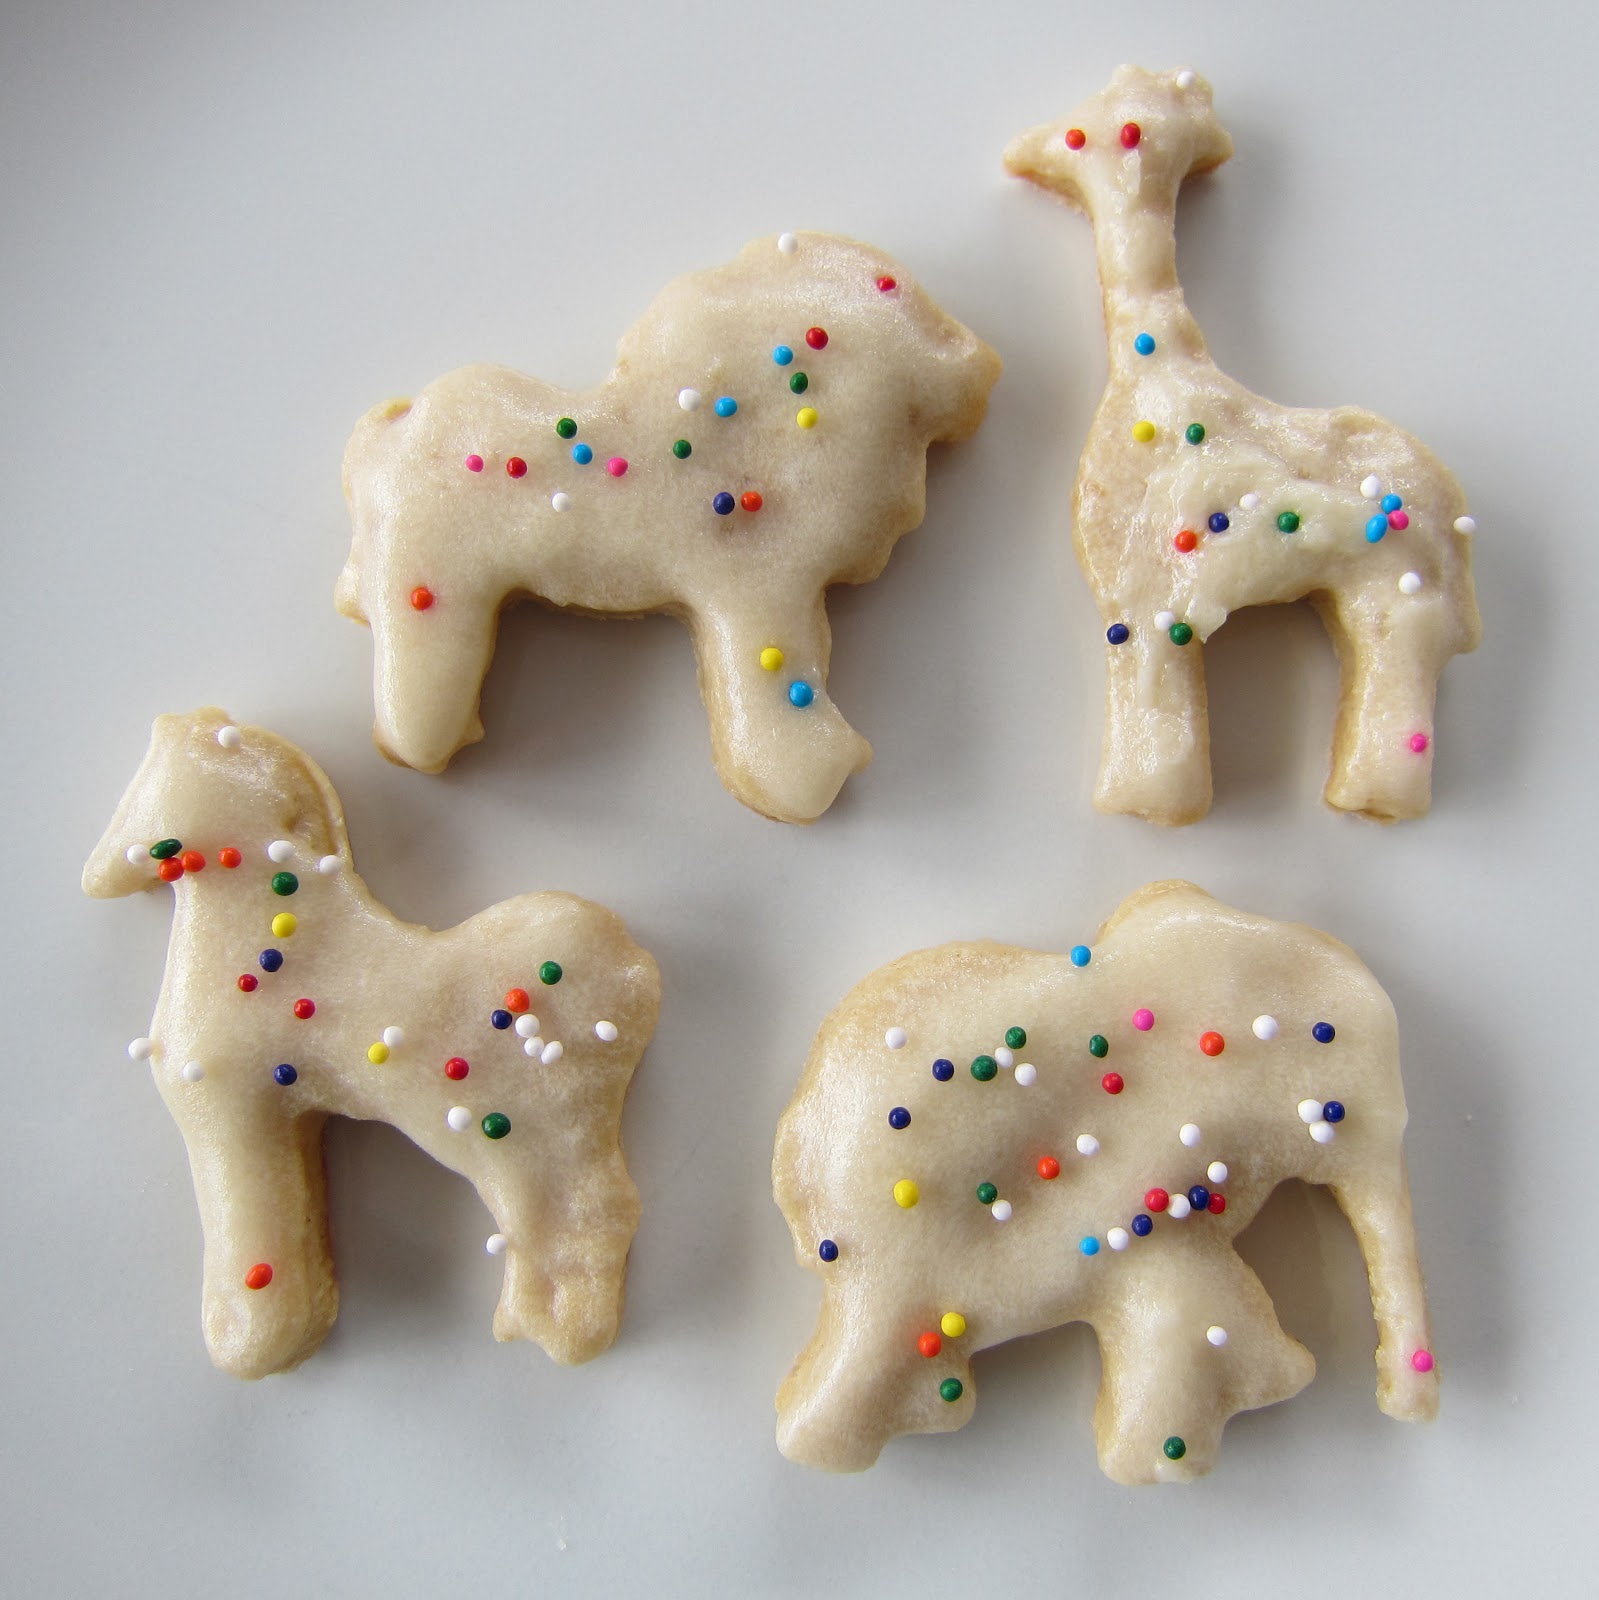
Animal Cracker Cookies

I remember being allowed to eat traditional animal crackers twice as a kid. How sad, I know. When I received animal cracker cookie cutters as a Christmas gift I realized that my boys have never had animal crackers and I guess they still haven't. Instead I made them myself and enjoyed every minute of it!


I can't begin to explain my excitement when I first used the cookie cutters. They are plunger cutters and now I believe ALL cookie cutters should be plunger cutters. It makes it so easy. Even if there wasn't a design to imprint in the dough it would still be easier because you can plunge the dough right out of the cutter, if the dough sticks, and mine always seems to. Get some!

Animal Cracker Cookies
6 T. butter, softened
1/2 c. sugar
1/4 c. brown sugar
1 egg
1 t. vanilla extract
1 1/2 c. all-purpose flour
1/2 t. cinnamon
1/4 t. nutmeg

Preheat oven to 350 degrees F.

In the bowl of a stand mixer fitted with paddle attachment cream butter and sugars on medium speed. Add egg and vanilla mixing well.

Sift in flour and spices and mix until well incorporated adding more flour if necessary to make a firm dough. Wrap dough in plastic wrap and chill for about 1 hour.

Remove dough from the plastic wrap and roll dough on a lightly floured work surface until 1/4 inch thick. Using cookie cutters cut out animal shapes. Transfer cut-outs to a parchment lined baking sheet. Arrange cut-outs close together. The dough will not spread or rise much with this recipe. Sprinkle with turbinado sugar if desired and if leaving the cookies un-frosted.

 
Bake approximately 6-8 minutes or until edges are lightly browned.

Transfer to a cooling rack and frost if desired.

Unfortunately, I did not write down the recipe I used for the frosting but it was basically a thin buttercream frosting that I let set up on the cookies without covering for about 2 hours.

February 18, 2013

Dark Chocolate Cocoa Cookies

Soft + Chewy = Delicious! 
A perfect cookie choice to make with the kiddos. You absolutely can't go wrong with these chocolate cookies. The kids love rolling the cookie dough in sugar and tasting some along the way!

For an added punch try adding some instant coffee grounds for a more grown-up taste.


Dark Chocolate Cocoa Cookies
1 c. whole wheat pastry flour
1/3 c. unsweetened dark cocoa powder
1/2 t. baking soda
pinch of salt
6 T. butter, softened
1 c. sugar, plus extra for rolling
1 egg
2 t. vanilla
1/2 t. instant coffee grounds (optional)

Preheat oven to 350 degrees F.

In a small mixing bowl combine flour, cocoa, baking soda and salt. Set aside.

In the bowl of a stand mixer fitted with paddle attachment cream butter and sugar. Add egg and vanilla (and coffee grounds if using) mixing well. Add dry ingredients a little at a time mixing well between each addition. Dough will be firm.

Using a one inch cookie scoop form dough into balls. Roll dough balls in sugar, place on a silpat lined baking sheet and flatten slightly.

Bake 8-10 minutes. Immediately transfer cookies to a cooling rack.

Eat and enjoy!

August 27, 2012

Raw Chocolate Peanut Butter Brownies

Raw, vegan, paleo, chewy, rich, sugar free, and healthy chocolate peanut butter brownies! Who just cringed?? If you did you might want to think twice and actually try this dessert. Your brain won't know the difference in taste only texture which is still quite delightful.

Your body will enjoy protein, omega-3 fatty acids and antioxidants by eating this dessert! Yay!


I made these on a day that the temperature was 86 degrees and the humidity was 78%. Not exactly a day you want to scorch up the kitchen by turning on the oven to make brownies. All you need for these is a nine inch square pan and a food processor.

These brownies are simple and delicious and will definitely please and satisfy the kiddos! When I was making them my son walked into the kitchen and said, "Yum, I smell brownies!"

Raw Chocolate Peanut Butter Brownies

Brownie Layer
1 c. walnuts
1/2 c. almonds
2 T. chia seeds
2 T. shredded unsweetened coconut
1 c. pitted dates
1 c. raisins
2 t. vanilla extract
1/4 c. cocoa powder
pinch of salt

In the bowl of a food processor add nuts and grind until crumbly. Add chia seeds and coconut and whiz to incorporate. Transfer mixture to a bowl. Without cleaning the food processor add dates and raisins. Grind until texture is like a thick paste. Add nut mixture to date mixture in the food processor and add cocoa powder, vanilla and salt. Grind again until mixture can hold together when pinched. Divide mixture in half and set aside.

Peanut Butter Layer
1/2 c. almonds
1/4 c. walnuts
3/4 c. raisins
1/2 c. oatmeal
1/2 c. peanut butter (no sugar please)

Grind nuts, raisins and oatmeal in the food processor until crumbly. Add peanut butter and whiz until mixture comes together and can hold its shape. Set aside.

Line a nine inch square baking dish with parchment paper. Using half of the brownie mixture press firmly into the bottom of the pan. Next press in the peanut butter layer. Add the second half of the brownie mixture on the top and press again.

Gently lift parchment paper out of the pan onto a cutting board. Using a sharp knife cut brownies into 16 equal squares.

Eat and enjoy! No waiting for the brownies to bake!

Store in an airtight container layering with parchment paper so brownies don't stick together.

Jumbo Spin Art Cookies

When someone mentions 'spin art' my mind tunnels directly back to awkward middle school carnivals where each room was filled with some sort of activity like the duck pond, ring toss, the cake walk, bean bag toss, and of course my favorite.....spin art! I would save up all of my tickets and only use them for spin art. I'm sort of embarrassed right now that I can actually recall these events in detail but I really loved watching that paint stream down onto that cheap white cardboard rectangle spinning a million miles an hour. When the table finally came to a complete stop it was like the world stood still for one second while I gasped at my newly created masterpiece. Then before it could dry the parent volunteer would slap it in a flimsy white matte and send me on my way! I felt like a million bucks!


Before my boys are old enough to enjoy the awkwardness of middle school I wanted them to feel my same love for spin art. Since I don't own an actual spin art table I decided to use my salad spinner and use food coloring instead of paint. And what goes well with food coloring? That's right.....cookies and frosting!

It doesn't matter if my boys are playing their favorite games or playing with their favorite toys - as soon as I get out the salad spinner they come running. They love to spin what ever greens I have in the device so you can imagine the excitement when it would be put to use with cookies instead of
greens! This could possibly be a child's dream!


You will need the following items:
- jumbo sugar cookies (recipe follows) - cut to fit the bottom of your salad spinner
- frosting (recipe follows) - I made cream cheese frosting but buttercream would also work
- salad spinner - don't worry....the food coloring washes right off
- liquid food coloring
- spreading knife
- rolling pin
- pizza cutter or sharp knife
- squirt bottle (optional)

This is a perfect activity for children and a fun family activity. If you had the cookies pre-baked and frosted this would also be a great activity at a child's birthday party!

Sugar cookies are certainly not boring and one of my personal favorite but if you want to you could make any cookie you want. I would suggest something smooth however because you will need to be able to spread frosting on very smoothly. Gingerbread would work well.

Sugar Cookies
1 c. butter
1 c. sugar
1 t. vanilla extract
1 egg
2 c. all-purpose flour
1 t. baking powder

Preheat oven to 350 degrees F.

In a large mixing bowl or the bowl of a stand mixer on medium speed cream butter and sugar until light and fluffy. Add vanilla and egg and mix until combined. Sift in baking powder and flour and mix until well combined.

Wrap dough in plastic wrap and refrigerate 30 minutes.

Remove dough from fridge and plastic wrap. Lightly flour a large work surface and roll dough to 1/4 inch thick and cut desired size circle using a table knife.

I made a paper pattern for the size of circle I needed and cut around it.

Place on ungreased sheet pan and bake 10 - 12 minutes or until edges are lightly browned. Removed from oven.

If dough spread too large cut warm cookie to desired size again using a pizza cutter or sharp knife.

Let cool completely on pan.

Makes approx. 6 cookies depending on thickness.

***I made jumbo cookies so they would fit nicely in the bottom of the salad spinner. You could make smaller cookies but you will need to find a way to keep them in the middle so they don't creep up the sides when the device is spinning. You can always cut the cookies if you think they are too big. Did I just say a cookie could be too big? Sorry, what was I thinking!!??

Cream Cheese Frosting
8 oz. cream cheese
4 T. butter
1 t. vanilla extract
3-6 c. powdered sugar (depending on desired consistency)

In a medium mixing bowl or the bowl of a stand mixer on medium speed combine cream cheese, butter and vanilla. Slowly add powdered sugar until you reach desired consistency.


Using a spreading knife smooth frosting on jumbo cookies. Be generous, everyone loves frosting!!

Gently place cookie in the bottom of salad spinner. I secured ours with a dollop of frosting on the bottom of the spinner.

You can drip on food coloring one of two ways. While it is spinning or before you start spinning. Before it spins (I think) is easier for kids but either way will give you the spin art look.

This isn't rocket science so I don't really have much to explain. Using liquid food coloring drip coloring where desired. Spin salad spinner gently enough that your cookie doesn't break apart but fast enough that you get the coloring to spin to the outside of the cookie. Repeat with more drops of coloring if necessary until you have the desired effect.

Gently remove cookie from spinner and allow coloring to dry (so lips and tongue aren't stained too bad) or eat right away simply because no one will want to wait!!

***I recommend using aprons or old clothes when the kids are dropping food coloring. You don't want stains on their nice clothes and they can get a bit carried away with all of the fun!

***If you want a more tie dyed look drop food coloring and then spritz with a few sprays of water (2-4 sprays) using a clean squirt bottle and then spin. It will cause the colors to run and bleed more as in picture #7.

***Don't worry, your salad spinner will wash clean without any stains - well, at least mine did!  :)

June 4, 2012

Martha Stewart's Surprise Cookies

Pick up the chocolate cookie with chocolate frosting...take a look...take a bite...SURPRISE! There's a marshmallow inside! The only thing missing from this recipe was a sprinkling of crushed graham crackers to make it a s'more cookie.


A few hours before heading out to a party my husband told me it would be nice if I made a dessert to share. Well, I didn't have time for an actual dessert so I scrambled through some recipes and came across this Surprise Cookie recipe from Martha Stewart. I happened to have all of the ingredients I needed so I made them!


They turned out to be really tasty cookies and I got a bunch of compliments. I mean, can you really go wrong with Martha Stewart??!! The cookies are more like the texture of moist dense cake bites. The marshmallow and frosting kept them very soft and chewy until the last cookie was gone. And they did all get eaten that evening!

Surprise Cookies
  • 1 3/4 cups all-purpose flour
  • 3/4 cup cocoa powder
  • 1/2 teaspoon baking soda
  • 1/2 teaspoon salt
  • 1/2 cup (1 stick) unsalted butter, softened
  • 1 cup sugar
  • 1 large egg
  • 1/2 cup milk
  • 1 teaspoon pure vanilla extract
  • 12 large marshmallows, cut in half horizontally

Preheat oven to 375 degrees. In a medium bowl, whisk together flour, cocoa powder, baking soda, and salt; set aside. 

In the bowl of an electric mixer fitted with the paddle attachment, cream together butter and sugar until light and fluffy, about 2 minutes. Add egg, milk, and vanilla, and beat until well combined. Add reserved flour mixture; mix on low speed until combined. 

Using a tablespoon or 1 3/4-inch ice cream scoop, drop dough onto ungreased baking sheets, about 2 inches apart. Bake until cookies begin to spread and become firm, 10 to 12 minutes. 

Remove baking sheets from oven, and place a marshmallow, cut-side down, in the center of each cookie, pressing down slightly. Return to oven, and continue baking until marshmallows begin to melt, 2 to 2 1/2 minutes. Transfer cookies to a wire rack to cool completely before frosting. 

Spread about 1 tablespoon of frosting over each marshmallow, starting in the center and continuing outward until marshmallow is covered.


Chocolate Frosting for Surprise Cookies
  • 2 cups confectioners' sugar
  • 4 tablespoons (1/2 stick) unsalted butter, melted and cooled
  • 1/4 cup cocoa powder
  • 1/4 cup milk
  • 1/4 teaspoon pure vanilla extract

Place confectioners' sugar in a medium bowl. Whisk in butter and cocoa powder. Add milk and vanilla, and whisk until well combined.

**I cut the frosting recipe in half and had a perfect amount to generously frost all of the cookies. I crushed one graham cracker rectangle and sprinkled over each cookie after it was frosted. If you wait until all the cookies are frosted it might be dry enough that the crumbles won't stick.**

April 19, 2012

Pistachio-Cranberry Florentine Cookies

There is something almost wrong with putting food in your mouth that literally melts away in a few seconds. It's like you never ate it.....but you did. You did eat it, and maybe a lot. Those calories actually count people, you aren't kidding anyone!

Well, these florentines are literally melt in your mouth goodness. They aren't overly sweet and the little bit of crunch from the pistachio and the tang from the cranberries are a perfect balance. This recipe is small (but you still shouldn't eat the whole batch in one sitting) but makes a lot of cookies. You don't have to feel guilty about eating three or four! Or do you??!! :)


Pistachio-Cranberry Florentine Cookies
2 T. butter
2 T. brown sugar
1 1/2 T. agave nectar
1 1/2 T. pistachios, finely chopped
1 1/2 T. dried cranberries, finely chopped
2 T. flour

Preheat oven to 375 degrees F.

In a small sauce pan melt butter, brown sugar and agave nectar. Remove from heat and stir in pistachios, cranberries and flour until combined.

On a silpat or parchment lined baking sheet using a 1/2 teaspoon measuring spoon, drop batter on sheet. Make six at a time leaving space in between so they don't run together.

Bake for 3-4 minutes or until bubbly and golden brown. Cool on the baking sheet until set then transfer to a cooling rack.

My boys and I gobbled these up so fast I didn't have time to enjoy them with tea but I know it would be a great pairing. Okay, I ate five of them. FINE! Six! :) Hey, I did my Jillian Michaels workout too!

Makes 1 1/2 to 2 dozen cookies depending on size.

April 16, 2012

Orange Cornmeal Cake

This is a recipe that I really wanted to try. I think my husband would eat cornbread everyday if I made it so I figured why not sweeten it up with this cornmeal cake I found at Martha Stewart! The recipe didn't call for any kind of syrup, glaze or frosting so I decided to add an orange cream cheese frosting to top the cake. Needless to say my husband ate it everyday until it was gone!


Orange Cornmeal Cake
  • 1/2 cup olive oil, plus more for pan
  • 2 large eggs
  • 1 cup sugar, plus 1/3 cup for topping
  • 1/2 cup dry white wine, (or orange juice)
  • 1 1/4 cups all-purpose flour, spooned and leveled
  • 1/2 cup yellow cornmeal
  • 2 teaspoons baking powder
  • 1 teaspoon salt
  • Finely grated zest of 1 orange
  • Orange segments, for serving (optional)

Preheat oven to 375 degrees. Brush bottom and sides of an 8-inch round cake pan with oil; line bottom with a round of wax or parchment paper, and brush paper with oil.

**To save myself the hassle of cutting a perfectly round piece of parchment paper that perfectly fits my round cake pan (something Martha would do!) I just greased and floured the pan. It worked 'perfectly' and the cake came out of the pan.....'perfectly'! ;)

In a large bowl, whisk together oil, eggs, 1 cup sugar, and wine until smooth. Add flour, cornmeal, baking powder, salt, and orange zest; whisk gently to combine.


Pour batter into prepared pan. Bake until cake begins to pull away from sides of pan and a tester inserted in center comes out clean, 35 to 40 minutes.

Cool in pan 20 minutes. Run a knife around edge of cake; invert cake gently onto a plate, and remove parchment paper. Reinvert cake onto a rack to cool completely. Serve with orange segments and orange cream cheese frosting.

Orange Cream Cheese Frosting
4 oz cream cheese, softened
2 T. butter
1 t. orange zest
1 T. orange juice
1 1/2 c. powdered sugar

With an electric mixer combine cream cheese, butter orange zest and orange juice. Add powdered sugar and continue mixing until frosting is light and fluffy.

Lemon-Blueberry Crumb Cake

Ahhh, what could be better than lounging on a Saturday morning with a hot cup of tea, a Saveur in my hands and Ina Garten on the Food Network (Barefoot Contessa) softly explaining the best way to make, say, anything?! Oh, wait, I didn't hear that, it was my boys fighting over Lego mini figures and not so patiently waiting for breakfast. Hey, a mom can dream can't she?!

I don't often follow recipes exactly and like to put my own twist on things but I couldn't help but hear Ina in my head when I tried to change some things. She is the expert, not me, so I listened. Okay, I added more lemon that I was supposed to and changed the streusel topping but at least I tried. I didn't want to use an entire stick of butter on the top Ina!! I know it would have been delicious but I just couldn't bring myself to do it. Sorry.
For the cake:
  • 6 tablespoons unsalted butter, at room temperature (3/4 stick)
  • 3/4 cup sugar
  • 2 extra-large eggs, at room temperature
  • 1 teaspoon pure vanilla extract
  • 1/2 teaspoon grated lemon zest (I used 1 teaspoon to make it more lemony - hence the title!)
  • 2/3 cup sour cream
  • 1 1/4 cups flour
  • 1 teaspoon baking powder
  • 1/4 teaspoon baking soda
  • 1/2 teaspoon kosher salt
  • 1 cup fresh blueberries
  • Confectioners' sugar for sprinkling (I omitted this)
Preheat the oven to 350 degrees F. Butter and flour a 9-inch round baking pan. (I used a nine inch square glass baking dish.)

Cream the butter and sugar in the bowl of an electric mixer fitted with paddle attachment on high for 4-5 minutes, until light. Reduce speed to low and add eggs 1 at a time, then add vanilla, lemon zest and sour cream. In a separate bowl, sift together flour, baking powder, baking soda and salt. With the mixer on low speed, add flour mixture to batter until just combined. Fold in blueberries and stir with spatula to be sure batter is completely mixed.
 
Spoon the batter into the prepared pan and spread it out with a knife.

For the streusel topping:

4 T. melted butter
1/2 c. oats
1/2 c. flour
1/4 c. sugar
1/4 c. brown sugar
1 t. cinnamon
1/4 t. fresh ground nutmeg

Mix together all dry ingredients. Pour melted butter over the top and combine.

With your fingers, crumble the topping evenly over the batter. Bake for 40 to 50 minutes, until a cake tester comes out clean. Cool completely and serve.

April 10, 2012

Teavana Tea Cookies

Tea is a daily event at my house. There isn't anything better than having a hot cup of tea first thing in the morning. Even my small boys enjoy sipping a cup of warm tea.

I use tea when ever I can. In rice, in baking, and in a cup of hot water, of course! I like it anyway I have had it and especially love Teavana tea. I decided to use two of their teas (Blueberry Bliss and Strawberry Lemonade) to make soft, chewy and delicious cookies.


Teavana Tea Cookies - two ways
6 T. butter
1/2 c. sugar
1 egg
1 c. flour
1/2 t. baking powder
1 t. orange zest
1 1/2 t. finely ground blueberry bliss tea
1 t. lemon zest
1 1/2 t. finely ground strawberry lemonade tea

In a medium mixing bowl cream butter and sugar. Add egg and stir to combine. Add flour and baking powder and stir.

This is the dough base. Divide dough in half.

Zest 1 t. each of lemon and orange rind and set aside.

To one half of the dough add orange zest and ground blueberry bliss tea. Mix well to incorporate. Form dough into a log and wrap tightly in waxed paper. Place in the freezer.

To the other half of dough add lemon zest and strawberry lemonade tea. Mix well to incorporate. Form dough into a log and wrap tightly in waxed paper. Place in the freezer.

Freeze both doughs until firm.

Preheat oven to 350 degrees. Remove doughs from the freezer and remove waxed paper. Slice dough into 1/4 inch slices and place on parchment lined baking sheet. Bake for 8 minutes or just until set. Remove from the oven and cool on a wire rack.

Eat and enjoy!

March 30, 2012

Banana Cream Stuffed Strawberries

This is a very quick and easy dessert finger food. They are also great for an after dinner treat and they look elegant so they are also perfect for a party!

My kids love eating strawberries alone but on occasion I stuff them with banana cream cheese for an extra smile!

Banana Cream Cheese Filling
8 oz cream cheese - whipped or regular
1/2 ripe banana mashed
1 t. vanilla extract
1/2 c. brown sugar
1 lb. strawberries

In a medium mixing bowl combine cream cheese, banana, vanilla and brown sugar. Stir until mixture is smooth and creamy. No lumps please! Fold in strawberry pieces.

Wash and dry 1 pound of whole strawberries leaving on the green tops. Cut one side of the strawberry off and finely dice it. Set aside. Once strawberries are cut in half carefully cut out the center. You can use a knife or a small melon baller.

Drop a spoonful of banana cream cheese mixture into the center of the strawberries. Amount will depend on the size of each strawberry. Be generous. There will be enough mixture to fill a 1 pound carton of strawberries.

Eat and enjoy!

March 5, 2012

Banana Cream Pie

My Aunt Linda makes two things that one could seriously obsess about. Cheese Ball and Banana Cream Pie. They are both sinfully delicious (but the cheese ball is for another day). I changed her pie filling recipe quite a bit, however, the nut crust is not to be messed with!


For the Crust:
1/2 c. butter
1/2 c. brown sugar
3/4 c. flour
1/4 c. chopped walnuts
1/4 c. chopped pecans

In a medium sauce pan melt butter over medium heat. Add brown sugar and stir until dissolved. Add flour and nuts and stir constantly until flour becomes crumbly. Remove promptly from heat. Pour mixture into a 9 inch pie pan and press to cover bottom and sides. You will be able to see a little butter pooling on the crust. Cool in the refrigerator.


For the Filling:
2 ripe bananas - sliced into 1/4 inch rounds
1 4oz box cooked pudding
3 oz cream cheese
1 T. sugar

Cook pudding according to package directions and let cool. You can substitute instant pudding but in my opinion cooked pudding is so much better and takes very little time.

Add cream cheese to the bowl of a stand mixer and cream with sugar until smooth. Add in cooled pudding and mix until smooth.

For the Whipped Cream:
1 c. heavy cream
3 T. sugar
1 t. vanilla extract

In a stand mixer fitted with whisk attachment add cream, sugar and vanilla. Whip until stiff peaks form. Set aside.

Assembly:
Layer bananas on cooled pie crust. Top with pudding mixture. Using a spatula or spreading knife carefully top with whipped cream. Refrigerate until firm, about 2 hours. Serve with a few sprinkles of pecans.


February 28, 2012

Oatmeal Cream Pies

Remember the day when you came home from school and opened the cupboard only to find a sinful box of Little Debbie Oatmeal Creme Pies?! Your eyes opened wide as you turned your head to see if anyone was watching and I know you tried really hard to eat just one but couldn't manage the task. Well, this is an organic and healthy twist on the classic but I promise you will feel just as naughty eating these soft and chewy cream pies - enjoy!


Oatmeal Cream Pies - modification on a cookie recipe (iced oatmeal applesauce cookies) from Martha Stewart

for the cookies:
3 T. butter
3/4 c. brown sugar
1/2 c. sugar
1 egg
1/2 c. applesauce
1 1/2 c. quick oats
1 c. flour
1/4 c. whole wheat flour
1/2 t. baking soda
1/4 t. baking powder
1/4 t. salt

Preheat oven to 350 degrees F.

In a stand mixer cream butter and sugars on medium speed. Add egg and applesauce. Turn off mixer and add in remaining ingredients. Turn mixer back on medium speed until all ingredients are well incorporated.

Using a 1 1/2 inch cookie scoop drop cookie dough onto a parchment lined baking sheet.

Bake until just set - approximately 10 minutes. Cool on a rack. Makes approximately 12 cream pies.

for the filling:
2 T. butter
2 oz. cream cheese
1 1/2 c. powdered sugar - give or take depending on how thick you want the filling
3-4 T. pure maple syrup

In a medium mixing bowl cream butter and cream cheese together. Add powdered sugar and incorporate. Add maple syrup and stir. Add more powdered sugar if necessary.

On a cooled cookie spread a layer of filling. Top with another cookie. Eat and enjoy. Yum!

February 26, 2012

Honey Walnut Cupcakes

I love making these cupcakes. Not only are they fun because you get to pipe little chocolate bees but they are actually healthy. With all of the organic ingredients it's a great excuse to eat cupcakes for breakfast! No one will object - I promise!


Organic Honey Walnut Cupcakes
3/4 c. walnuts - toasted and finely ground
1 1/4 c. all-purpose flour
1/4 c. whole wheat flour
3/4 t. baking soda
1/4 t. salt
1/4 t. cinnamon
1/2 c. honey
1/2 c. agave nectar
1/2 c. unsweetened applesauce
1/2 c. vanilla yogurt
3 eggs

Before you get ahead of yourself you will want to toast the walnuts. Yes, you really do need to toast the walnuts. I know it's an easy step to leave out but the flavor profile is much different (and better) with toasted nuts.

Preheat oven to 350 degrees F. Toast walnuts 5-7 minutes or until you can start to smell the delightful aroma fill your kitchen. Remove from the oven and put directly into a food processor. Whiz until finely crumbled. Set aside.

In a large bowl sift dry ingredients together. Set aside.

In a medium bowl whisk all of the wet ingredients together. I've always heard to add your eggs one-at-a-time but I've never noticed a significant difference in the final outcome so I say just throw them all in at once! Add the vanilla last and whisk one last time.

Combine wet and dry ingredients together adding walnuts in last. Line cupcake tin(s) with papers and fill 3/4 full.

Bake at 350 degrees F for 15-18 minutes or until toothpick comes out clean. Let cool completely.

Homemade Whipped Cream
1 c. heavy cream
3-4 T. sugar
1 t. vanilla extract1/4 t.
vanilla bean powder (optional)

Combine all ingredients in a mixing bowl. Beat with mixer on high until stiff peaks form. Fit a sandwich bag with a large round decorating tip and fill with whipped cream.

Chocolate Bees
1/4 c. dark chocolate chips

In a microwave safe container melt chocolate 15 seconds at a time until fully melted. While chocolate is melting line a baking sheet with waxed paper and fit a sandwich bag with a small round decorating tip. Fill sandwich bag with melted chocolate and pipe a bee shape of your choice onto waxed paper.

Refrigerate until you need to garnish. If you know how to temper chocolate by all means do it! I don't so I just refrigerate until ready to serve.

Assembly
Pipe whipped cream on completely cooled cupcakes. Top with a chocolate bee. Eat and enjoy. Yum!

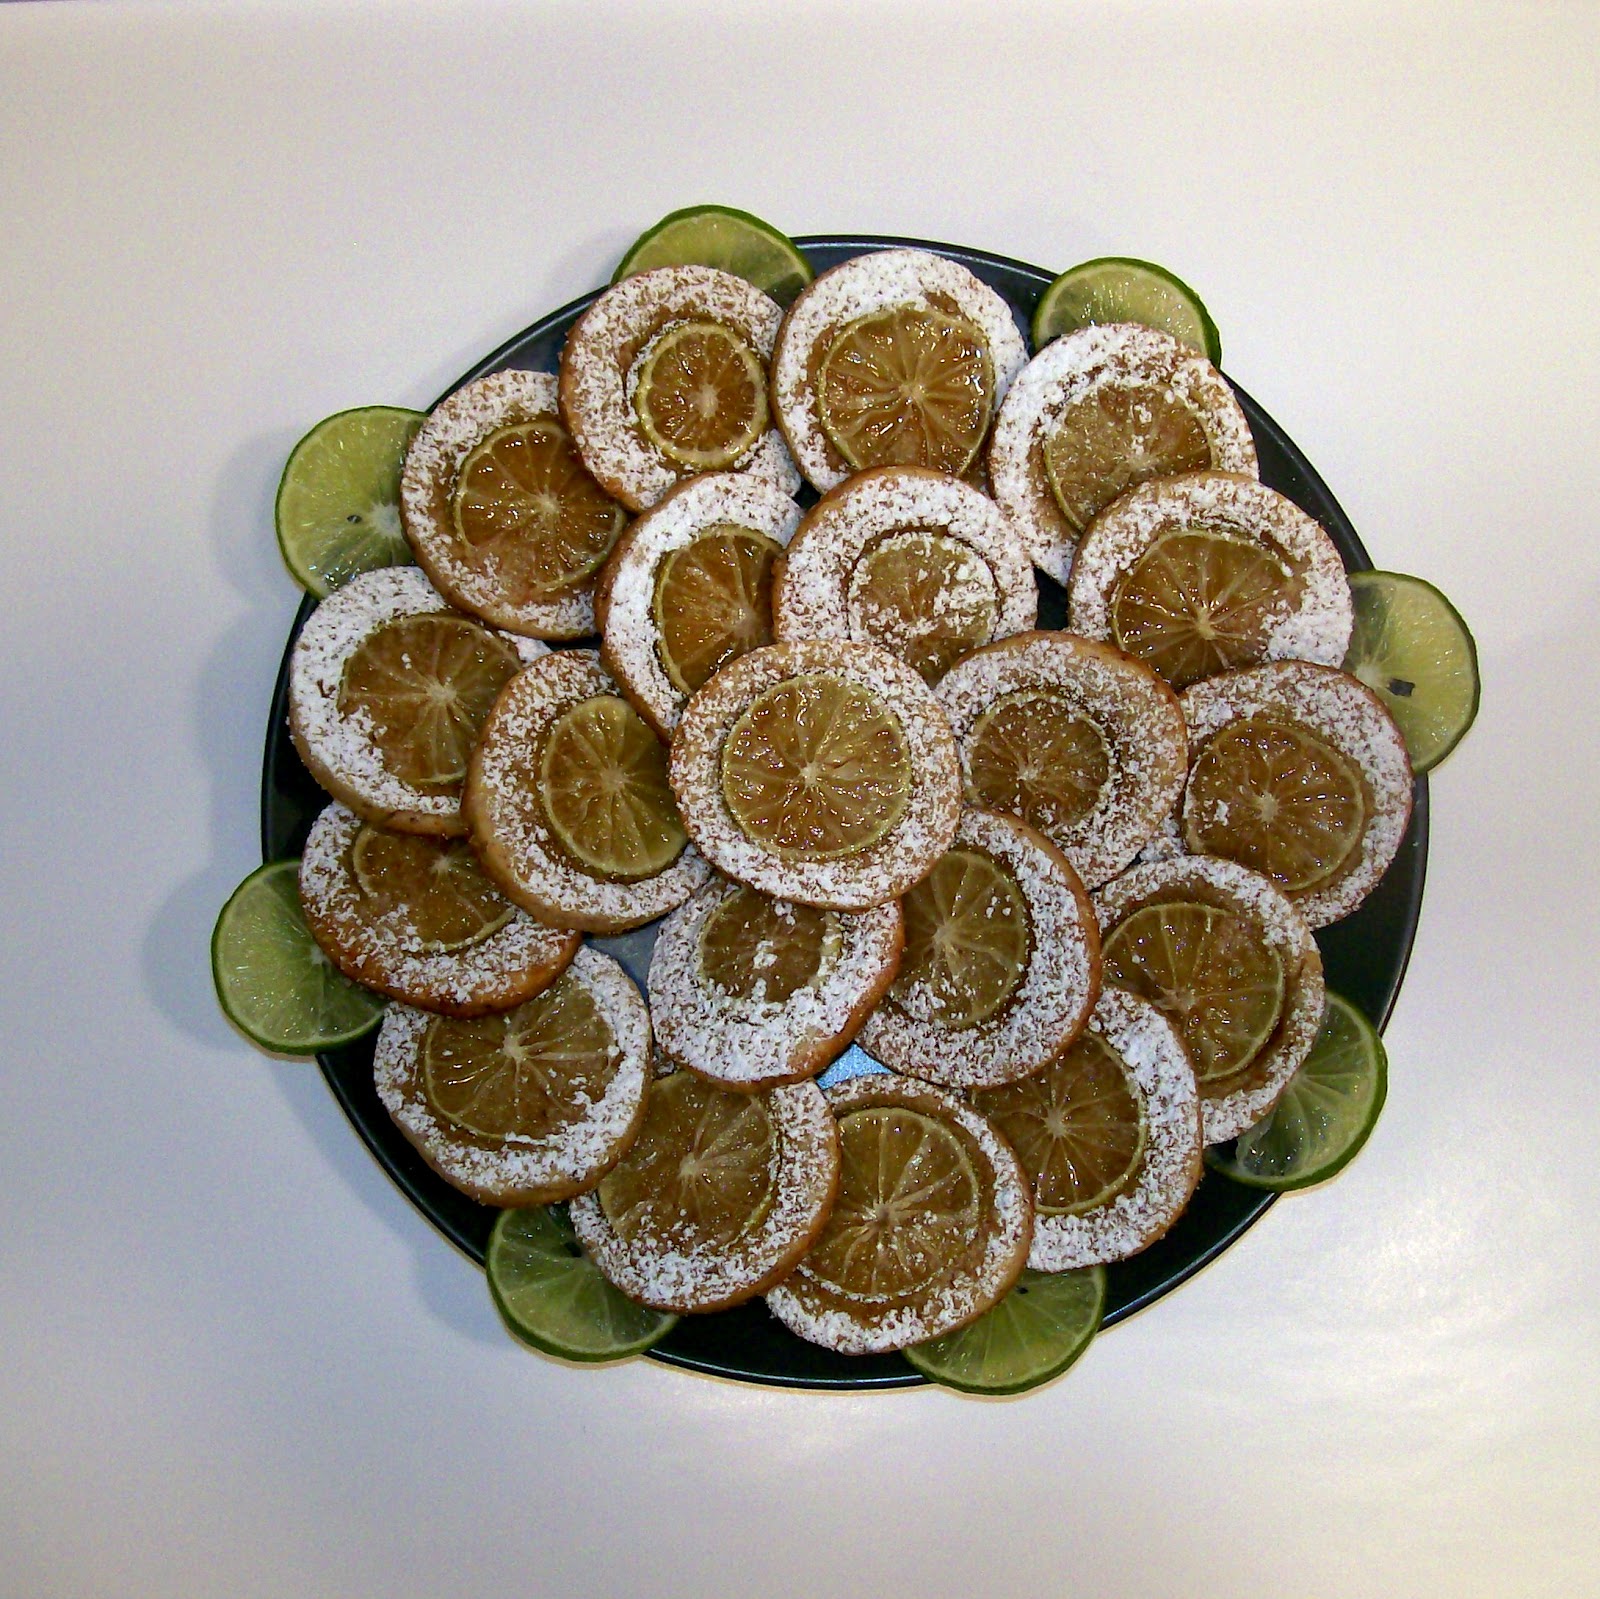
Bitter Lime Wheel Cookies

When my mother-in-law sent me a box of freshly picked organic key limes from her tree in AZ I knew exactly what to do with them!

If you are a tea drinker or a bitter tea lover (which I am) you should definitely try these cookies with your next cup of tea! They are a little sweet with a touch of bitter and have a great texture from the ground almonds.

Bitter Key Lime Wheel Cookies
10 T. butter, softened
1 T. key lime zest
1 egg
3⁄4 c. confectioners’ sugar, extra for dusting
1⁄2 c. sugar, extra for sprinkling
1⁄4 cup brown sugar
2 c. flour
1 c. almonds, finely ground
1 T. fresh squeezed key lime juice
6 key limes - give or take depending on size and juiciness.

Finely grind almonds in a food processor until they resemble coarse sand.

Using a microplane grate enough key limes to get 1 tablespoon of zest. Cut those same limes to get 1 tablespoon of juice.

In a large mixing bowl beat butter, zest and egg until incorporated. Mixture will look lumpy. Add sugars and mix. Add flour and stirring briefly, then add almonds. Once dough is well-combined form into two logs and wrap with parchment paper. Place in the freezer until hard, approximately 1 1⁄2 hours.

While dough is in the freezer use remaining key limes and cut with a mandolin. Please use caution and the finger guard with this slicing device. It is extremely sharp.

Preheat oven to 350 degrees F. Line a baking sheet with parchment paper

Take dough out of the freezer and remove parchment paper wrapping. With a sharp knife cut slices 1/4 inch thick. This dough won't rise or spread so arrange close together on baking sheet. Top each cookie with a key lime slice and firmly press the lime slice into the cookie dough. Sprinkle liberally with granulated sugar.


Bake for 5-7 minutes or until lightly browned. Remove from oven and cool on a wire rack.

While cookies are still warm dust with confectioners' sugar. The limes will absorb the sugar leaving a wheel shape around the edge. You can eat the lime with the cookie or remove it for less of a bitter flavor. It's personal preference for bitterness. Great with tea!

Eat and enjoy. Yum!

February 25, 2012

Dried Fruit Truffles

I make these truffles often for my family. They are healthy treats that are packed with protein and omega-3 fatty acids. They are so easy to make and taste delicious.


The four recipes that I like to make most are listed below, however, any fruit and nut combination would work. I dressed the truffles up for the photo but the garnish/decoration is definitely optional.

Date Truffle
1/2 c. whole pitted dates
1/4 c. raisins
1/2 c. walnuts
1/8 c. oatmeal
1 T. ground flax seeds

Cranberry-Plum Truffle
1/4 c. dried cranberries (reserve one or two for garnish)
1/4 c. dried plums
1/8 c. oatmeal 
1/4 c. almonds (reserve one or two for garnish)
1 T. ground flax seeds 

Peanut Butter Truffle
1/4 c. peanut butter
1/2 c. raisins
1/4 c. almonds
1/4 c. oatmeal
1 T. ground flax seeds

Strawberry Truffle
1/2 c. dried strawberries (reserve one or two for garnish)
1/2 c. walnuts (reserve one or two for garnish)
1/8 c. oatmeal
1 T. ground flax seeds 

Using a spice grinder grind flax seeds to a powder. 

In a food processor add all ingredients (per truffle recipe). Turn food processor on and grind until mixture looks like course salt and can hold together when pinched. If
mixture is too dry to hold together grind a bit more until it does. The dried fruit will eventually become sticky if you grind it long enough.

Using a rounded tea spoon shape the mixture into equally sized round balls. You could also use a melon baller or small cookie scoop depending how large or small you
want the truffles.

Each recipe will make approximately 16 teaspoon sized truffles.

If you are making multiple recipes of truffles and peanut butter is one of them be sure and make that one last. I make one batch and use the food processor again for the
next flavor without cleaning. Makes it quick and easy!

Store refrigerated 7-10 days in an airtight container.