
I remember being allowed to eat traditional animal crackers twice as a kid. How sad, I know. When I received animal cracker cookie cutters as a Christmas gift I realized that my boys have never had animal crackers and I guess they still haven't. Instead I made them myself and enjoyed every minute of it!
I can't begin to explain my excitement when I first used the cookie cutters. They are plunger cutters and now I believe ALL cookie cutters should be plunger cutters. It makes it so easy. Even if there wasn't a design to imprint in the dough it would still be easier because you can plunge the dough right out of the cutter, if the dough sticks, and mine always seems to. Get some!
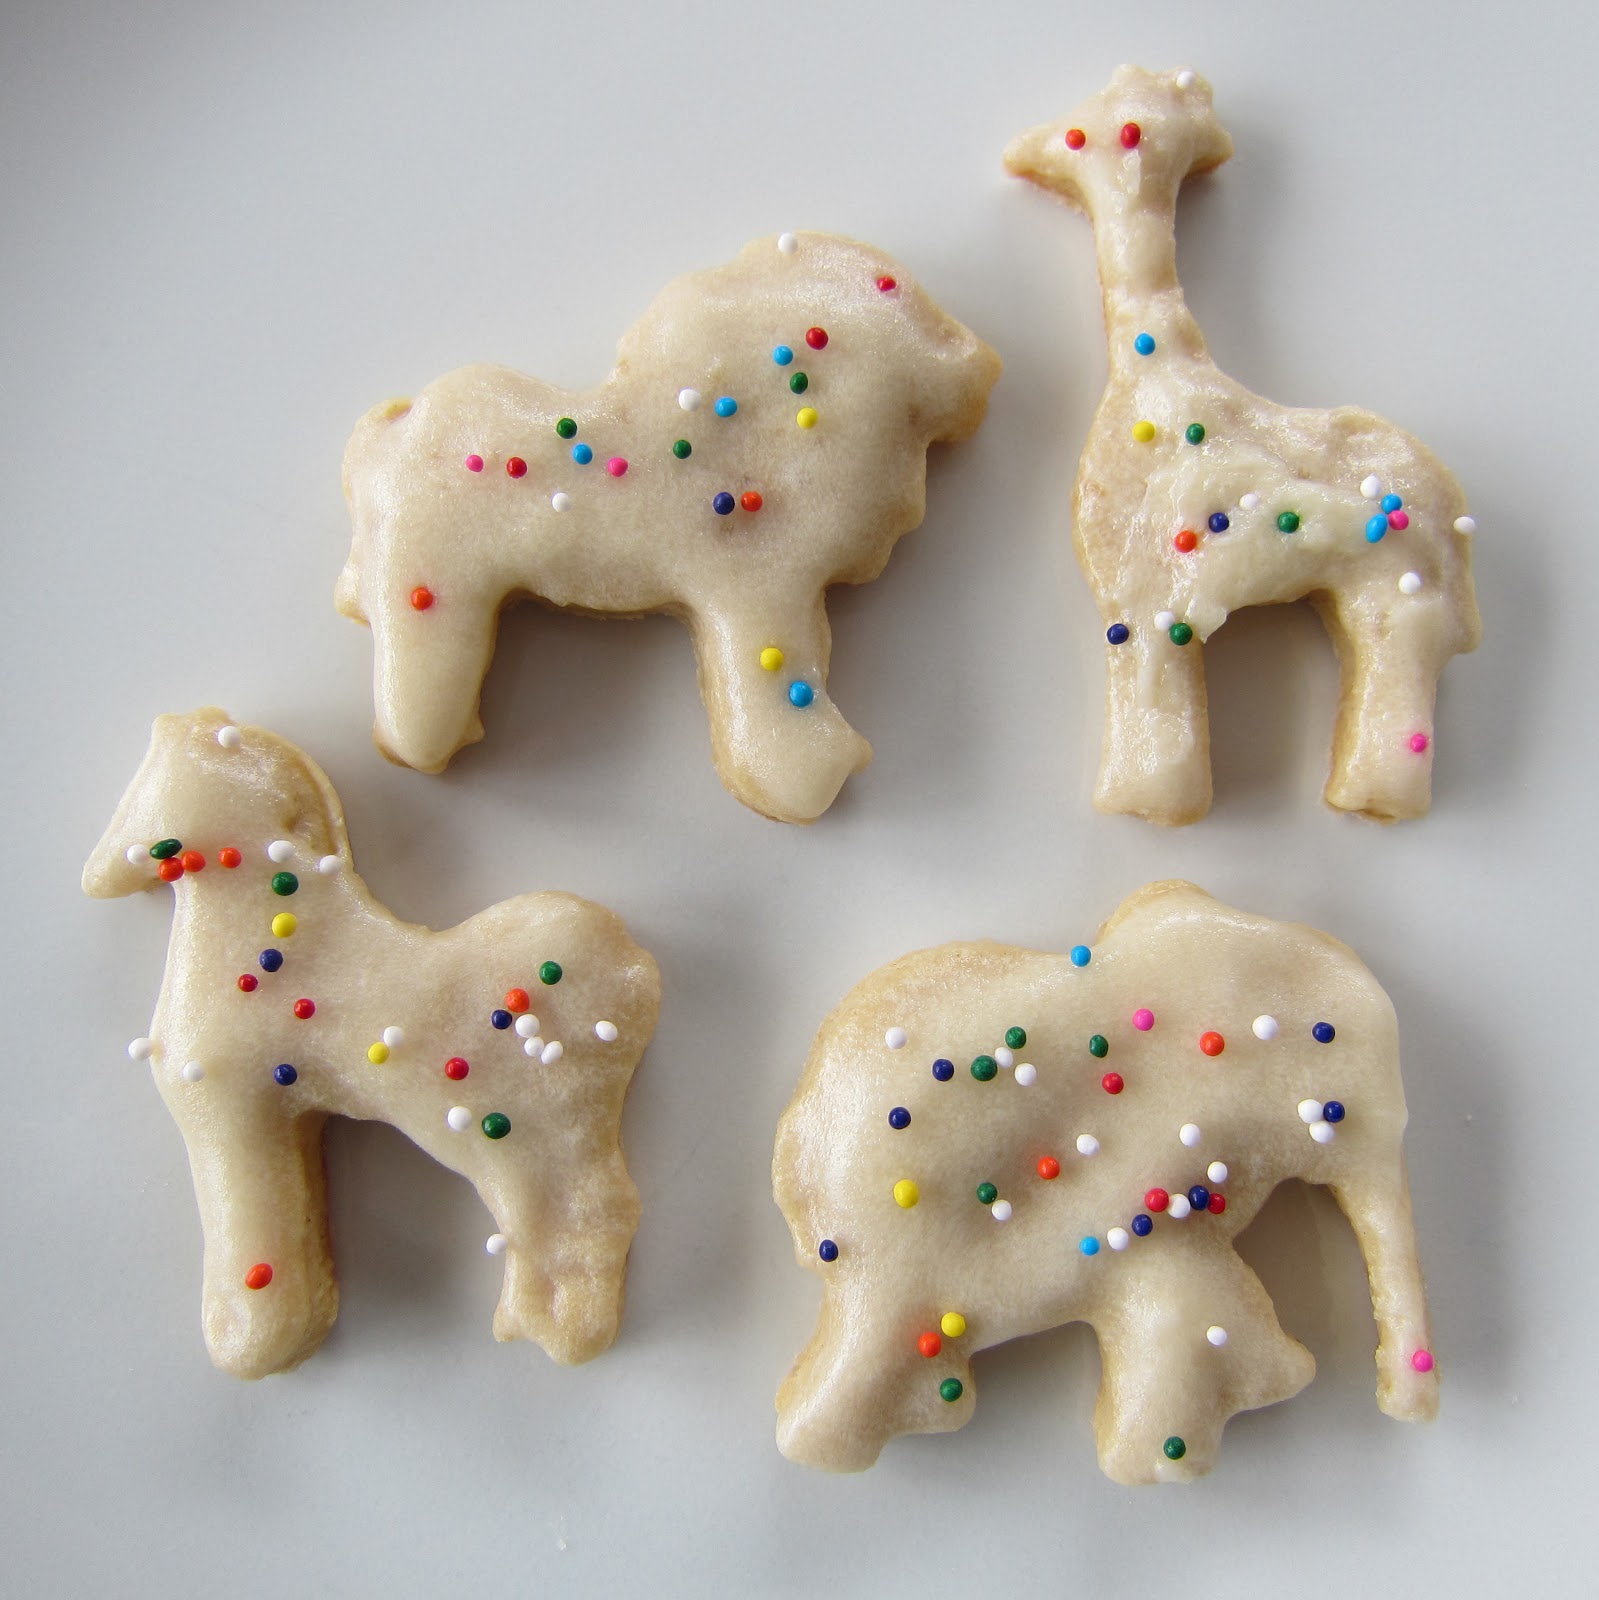
Animal Cracker Cookies
6 T. butter, softened
1/2 c. sugar
1/4 c. brown sugar
1 egg
1 t. vanilla extract
1 1/2 c. all-purpose flour
1/2 t. cinnamon
1/4 t. nutmeg
Preheat oven to 350 degrees F.
In the bowl of a stand mixer fitted with paddle attachment cream butter and sugars on medium speed. Add egg and vanilla mixing well.
Sift in flour and spices and mix until well incorporated adding more flour if necessary to make a firm dough. Wrap dough in plastic wrap and chill for about 1 hour.
Remove dough from the plastic wrap and roll dough on a lightly floured work surface until 1/4 inch thick. Using cookie cutters cut out animal shapes. Transfer cut-outs to a parchment lined baking sheet. Arrange cut-outs close together. The dough will not spread or rise much with this recipe. Sprinkle with turbinado sugar if desired and if leaving the cookies un-frosted.
Bake approximately 6-8 minutes or until edges are lightly browned.
Transfer to a cooling rack and frost if desired.
Unfortunately, I did not write down the recipe I used for the frosting but it was basically a thin buttercream frosting that I let set up on the cookies without covering for about 2 hours.
Showing posts with label snack. Show all posts
February 19, 2013
August 29, 2012
Cake Batter Popcorn
I thought I was being really creative and inventive when I thought to make cake batter popcorn. Turns out there are already many recipes out there to follow to make this, however, all of them that I read used shortening (gross!) and white chocolate along with the cake mix. Since I can't bring myself to use shortening I knew I had to come up with something else.
My mom makes the most delicious caramel corn so I decided to modify her recipe to make it taste like cake batter but still be perfectly coated and crunchy!!
I have a serious problem with GMO (genetically modified organism) anything and since corn is something like 90% (don't quote me on the percentage) genetically modified these days I only buy organic non-GMO popcorn. You choose but be aware that unfortunately most corn is modified in some way.
Cake Batter Popcorn
1 stick butter
1/2 c. sugar
1 teaspoon salt
1 c. light corn syrup
1 c. yellow cake mix
1/2 t. baking soda
1 1/2 t. vanilla extract
Preheat the oven to 250 degrees F.
Pop 4 quarts (16 cups) of popcorn and divide equally between two lightly buttered 9 x 13 pans making sure there are no kernels left. I use my hands after popping the corn and put it in the baking pans leaving the un-popped kernels in the bottom of the bowl. It's no fun to break your tooth on a popcorn kernel so take your time doing this! (I think using an air popper is the easiest way to make popcorn but if you don't have one you can make it on your stove in a large stock pot with a little oil.)
Combine the butter, sugar, salt and corn syrup (try to get corn syrup that does not have HFCS) in a medium saucepan. Bring to a boil over medium heat, stirring enough to blend. Once the mixture begins to boil, boil for 5 minutes on medium heat stirring constantly.
Remove from the heat, and stir in the baking soda, cake mix and vanilla. The mixture will become light and foamy.
Immediately pour cake batter sauce over the popcorn in the pans, and stir to coat.
Bake for 1 hour, removing the pans, and giving them each a good stir every 15 minutes. After 30 minutes shake on some sprinkles for added fun! If you do this any sooner the colors will run making a messy looking popcorn and who wants that?!
After one hour remove pans from the oven and continue to gently stir the popcorn until it cools enough so it doesn't stay in big clumps.
Serve to anyone who loves popcorn or cake batter!
February 25, 2012
Dried Fruit Truffles
I make these truffles often for my family. They are healthy treats that are packed with protein and omega-3 fatty acids. They are so easy to make and taste delicious.
The four recipes that I like to make most are listed below, however, any fruit and nut combination would work. I dressed the truffles up for the photo but the garnish/decoration is definitely optional.
Date Truffle
1/2 c. whole pitted dates
1/4 c. raisins
1/2
c. walnuts
1/8 c. oatmeal
1 T. ground flax seeds
Cranberry-Plum Truffle
1/4 c. dried cranberries (reserve one or two for garnish)
1/4 c. dried plums
1/8 c. oatmeal
1/4 c. almonds (reserve one or two for garnish)
1 T. ground flax seeds
Peanut Butter Truffle
1/4 c. peanut butter
1/2 c. raisins
1/4 c. almonds
1/4 c. oatmeal
1 T. ground flax seeds
Strawberry Truffle
1/2 c. dried strawberries
(reserve one or two for garnish)
1/2 c. walnuts (reserve one or
two for garnish)
1/8 c. oatmeal
1 T. ground flax seeds
Using a spice grinder grind flax seeds to a powder.
In a food processor add all ingredients (per truffle recipe). Turn food processor on and grind until mixture looks like course salt and can hold together when pinched. If
mixture is too dry to hold together grind a bit more until it does. The dried fruit will eventually become sticky if you grind it long enough.
Using a rounded tea spoon shape the mixture into equally sized round balls. You could also use a melon baller or small cookie scoop depending how large or small you
want the truffles.
Each recipe will make approximately 16 teaspoon sized truffles.
mixture is too dry to hold together grind a bit more until it does. The dried fruit will eventually become sticky if you grind it long enough.
Using a rounded tea spoon shape the mixture into equally sized round balls. You could also use a melon baller or small cookie scoop depending how large or small you
want the truffles.
Each recipe will make approximately 16 teaspoon sized truffles.
If you are making multiple recipes of truffles and peanut butter is one of them be sure and make that one last. I make one batch and use the food processor again for the
next flavor without cleaning. Makes it quick and easy!
Store refrigerated 7-10 days in an airtight container.
Subscribe to:
Posts (Atom)