Chewbacca is surely one of the all-time favorite characters in Star Wars and with the new movie I wasn't surprised when I got a request for a Chewbacca cake! This was so fun (and easy) to make. I loved every minute of it! A step-by-step tutorial of 'How to Make Chewy' is coming soon! Stay tuned. In the mean time share this on Pinterest!!
February 29, 2016
February 25, 2016
Collapsible Easter Basket
Easter has been my favorite holiday ever since I was a little girl. I
would start to get super excited when the Cadbury commercials would
start advertising on TV. I could almost taste the Cadbury Crème Eggs and
I seriously wished for the Cadbury Bunny to be my very own pet. Each
year I would be sure to tell the Easter Bunny that all I wanted in my
Easter basket was Cadbury Eggs (and some live baby chicks, but that’s
another story)!
I didn’t want jelly beans, malted milk balls, peanut butter eggs or anything else and on Easter morning. I would be absolutely ecstatic when I would find my hidden plastic eggs and open them to reveal Cabury Eggs inside. I even had a specific way I would eat them for the most possible enjoyment! I will never forget those days….aah! Although I limit myself to one Cadbury Crème Egg per year now (I learned how to eat healthy, thank goodness) they still make me smile!
 Now that you know how much I love Easter
it’s time to start working on a collapsible Easter basket to fill with
all those Cadbury Eggs!!
Okay, here we go!
Step 4: Pin all layers together.
I didn’t want jelly beans, malted milk balls, peanut butter eggs or anything else and on Easter morning. I would be absolutely ecstatic when I would find my hidden plastic eggs and open them to reveal Cabury Eggs inside. I even had a specific way I would eat them for the most possible enjoyment! I will never forget those days….aah! Although I limit myself to one Cadbury Crème Egg per year now (I learned how to eat healthy, thank goodness) they still make me smile!
 Now that you know how much I love Easter
it’s time to start working on a collapsible Easter basket to fill with
all those Cadbury Eggs!!
I had the idea of collapsible baskets
when my boys started accumulating them year after year when loving
grandmothers kept buying them each Easter. Tip to grandmothers: we
really appreciate your thoughtfulness, however, most of us don’t have a
closet dedicated solely to Easter baskets! So, if any grandmothers are
reading this, we love you very much, we just have too much guilt
throwing out Easter baskets every year but don’t have room to store
them!
Okay, here we go!
Collapsible Easter Basket Instructions:
- ½ yard each of two coordinating fabrics (fat quarters would work well if you made the basket slightly smaller)
- ½ yard craft interfacing
- Thread
- Pinking sheers or pinking rotary blade
- Hot iron
- Buttonhole attachment
- Two buttons
- Seam ripper
- Needle
- Disappearing fabric marker
- Pins
- Sewing machine
Step 1: Cut out two
squares of fabric that measure 12 ½ by 12 ½ inches. (You can make these
squares any size you want, however, when I was experimenting with the
baskets the bigger the square was the more flimsy the basket was…and we
need this to be sturdy for all those eggs!)
Step 2: Cut out two squares of interfacing (I used
Pellon 808 Craft-Fuse Fusible Interfacing) that are 12 by 12 inches. If
you are making a different size account for ¼ inch on each side. Iron
the interfacing on the wrong side of each piece of fabric centering the
interfacing.
Step 3: Decide which fabric will be the inside of the
basket and using a disappearing fabric marker draw a ¼ inch border
around the edge of the square. Divide that square into 9 equal smaller
squares.
Step 4: Pin all layers together.
Step 5: Stitch one entire side along your marked edge.
Turn the corner and when you get to the first line you are going to turn
your fabric and stitch 1/3 of the way down and 1/8 inch away from the
line. Turn and stitch ¼ inch. Turn again and stitch back to up to the
edge. Repeat this same pattern on the next line and on the opposite side
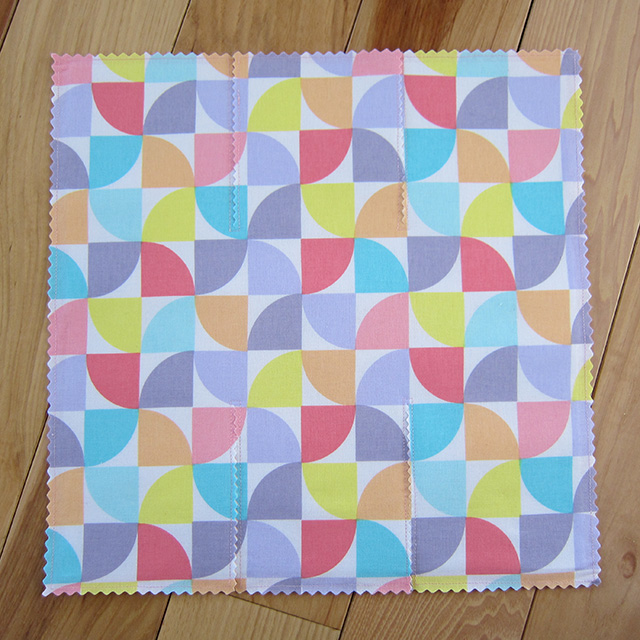
of the fabric. Or, refer to the photo for a visual of how to sew the
lines!!!
Step 6: Using pinking sheers or a rotary cutter fitted
with a pinking blade trim all the way around the outside edge. Now
carefully make one clean cut in between the stitched lines. This will
create the flaps that will make the sides of the basket.
Step 7: Fold flaps and finger crease all marker lines.
Step 8: Ready to sew
lots of buttonholes? We will sew six of them by the end of this tutorial
so if you haven’t done many you are going to be a pro by the end of
this!
Since we have double reinforced fabric
square buttonholes are going to work best. First fold the flaps
according to the first picture in this step (middle flap up first and
two side tips criss-cross over each other). Mark where the buttonholes
will be by sticking pins through all layers of fabric and draw a line
with a disappearing fabric marker. Pull back one layer of fabric and
mark where the second buttonhole will be.
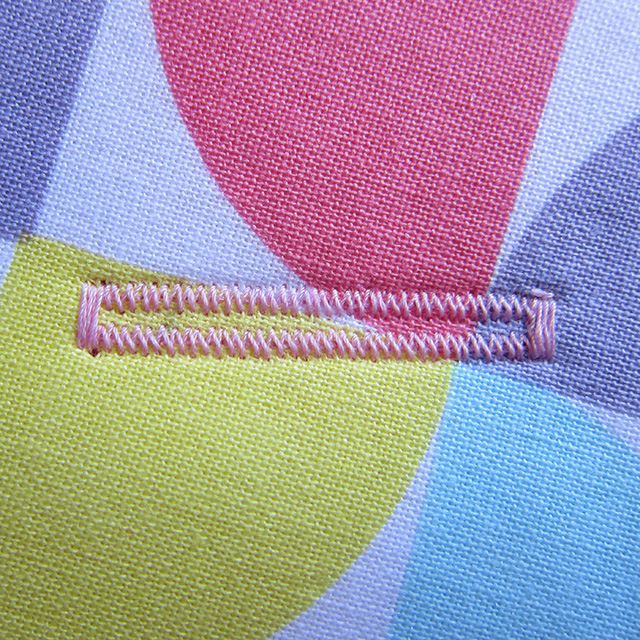
Step 9: Place button in buttonhole foot and attach to
your machine. Place fabric under the foot and align with markings.
(Check your sewing machine user manual to see details on buttonholes for
your specific machine.) Sew the buttonhole.
Step 10: Using a sharp seam ripper or small sharp
scissors cut the opening. Check to make sure your button fits through
the buttonhole. It should be a snug fit. Repeat three more times on the
basket.
Step 11: Sew two buttons (on either side) aligning with
the buttonholes. Make sure to leave enough slack in the thread for your
button to go through three layers of fabric (account for the handle
that we haven’t made yet!). My boys literally have thousands of Legos so
I grabbed a sword to account for the layers of fabric. If the thread is
too tight on the button the fabric will bunch and the basket will look
misshapen.
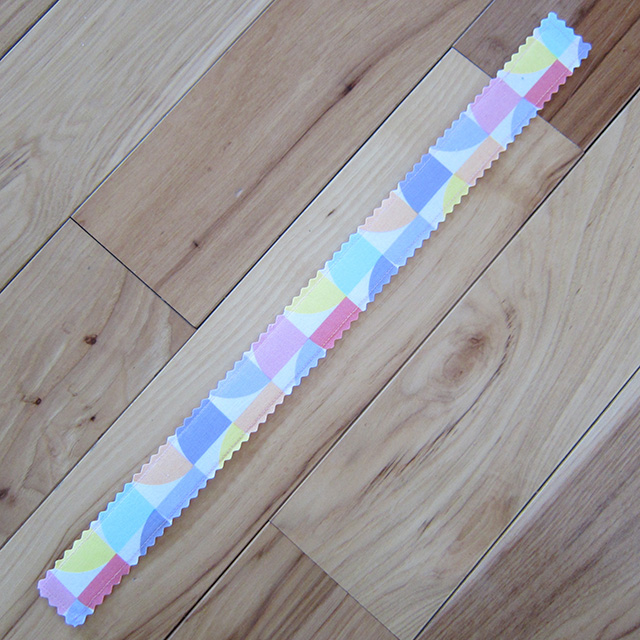
Step 12: Cut two pieces of fabric for the handle 17 ½
inches by 1 ½ inches. Cut two pieces of interfacing 16 ½ inches by 1
inch and iron them onto the wrong sides of the fabric carefully
centering them.
Step 13: Stitch all the way around the outside of the
rectangle leaving a ¼ inch seam allowance. Trim with pinking sheers for
the same raw edge effect as the basket.
Step 14: Mark where you want buttonholes on the handle and sew buttonholes according to the same directions above.
Step 15: Assemble basket and fill with Easter grass,
candy and eggs…preferably Cadbury! When you are finished, unbutton and
fold flat for easy storage! It will be ready for you to use again next
year!
February 15, 2016
Best Brownies Ever
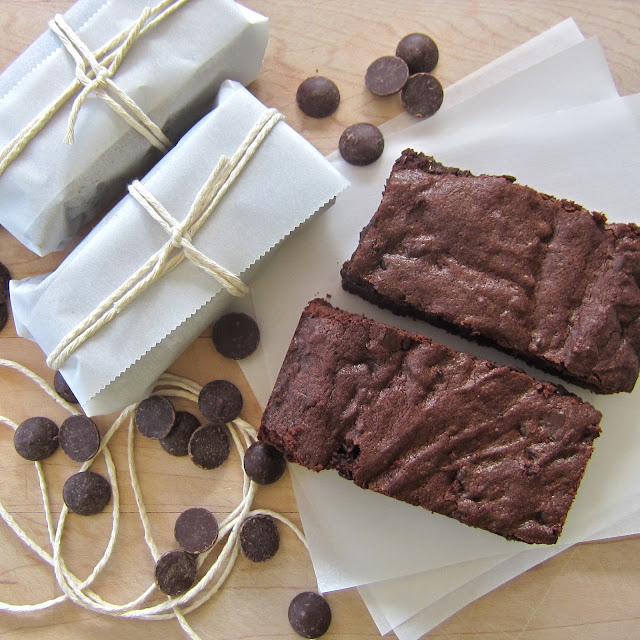
The best brownies ever definitely consist of quality cocoa powder and rich dark chocolate! A hit of coffee and a dollop of sour cream adds moist delicious decadence.
It's cold here in the Midwest and baking seems like a natural way to keep the kitchen warm and toasty. My favorite part of baking is when the baked goods are finished and I can open the oven door and relish in the searing heat pouring from the oven!
One of my good friends lives several states away from me so each year I send him a batch of thick, fudgy and delicious chocolate brownies for his birthday. This occasion was the perfect excuse to warm me right up!
1 1/2 sticks butter (3/4 cup), melted and cooled
1/4 cup sour cream
3 eggs
1 tablespoon pure vanilla extract
1 cup all purpose flour
1/2 teaspoon baking powder
1 teaspoon instant coffee
1/2 teaspoon salt
1 cup sugar
1/2 cup dark chocolate chips
Add melted butter and mix to combine.
Add egg mixture and mix well.
Fold in chocolate chips.
Transfer batter to prepared pan and smooth to an even thickness.
Bake brownies 20-25 minutes or until toothpick inserted comes out clean.
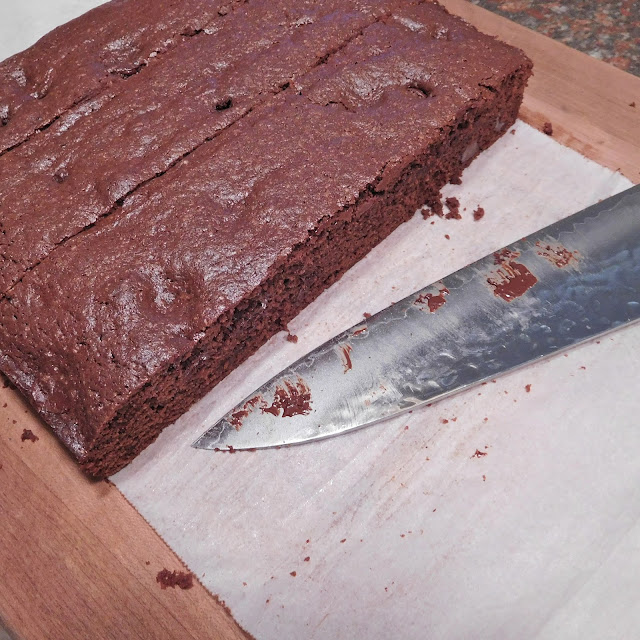
Cool completely on wire rack. Cut, serve, eat and enjoy! Or send away to a friend!
You can also find this Best Brownies Ever Recipe over at Instructables.com or by clicking this link - http://www.instructables.com/id/Brownies-Thick-Rich-Delicious/
It's cold here in the Midwest and baking seems like a natural way to keep the kitchen warm and toasty. My favorite part of baking is when the baked goods are finished and I can open the oven door and relish in the searing heat pouring from the oven!
One of my good friends lives several states away from me so each year I send him a batch of thick, fudgy and delicious chocolate brownies for his birthday. This occasion was the perfect excuse to warm me right up!
Best Brownies Ever - Recipe
1 1/2 sticks butter (3/4 cup), melted and cooled
1/4 cup sour cream
3 eggs
1 tablespoon pure vanilla extract
1 cup all purpose flour
1/2 teaspoon baking powder
1 teaspoon instant coffee
1/2 teaspoon salt
1 cup sugar
1/2 cup dark chocolate chips
Brownie Prep:
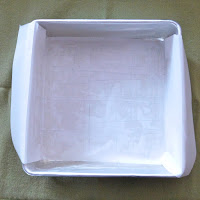
Preheat oven to 350 degrees F. Grease a 9x9 baking pan and line with parchment paper. Grease parchment paper. Set aside
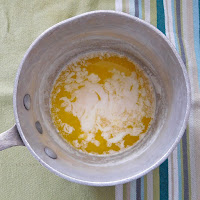
In a small sauce pan melt butter over low heat. Set aside.
In a small mixing bowl add eggs, sour cream and vanilla. Beat well. Set aside.
In a small sauce pan melt butter over low heat. Set aside.
In a small mixing bowl add eggs, sour cream and vanilla. Beat well. Set aside.
In the bowl of a stand mixer fitted with paddle attachment combine flour, baking powder, coffee, salt and sugar.
Add melted butter and mix to combine.
Add egg mixture and mix well.
Fold in chocolate chips.
Transfer batter to prepared pan and smooth to an even thickness.
Bake brownies 20-25 minutes or until toothpick inserted comes out clean.
Cool completely on wire rack. Cut, serve, eat and enjoy! Or send away to a friend!
You can also find this Best Brownies Ever Recipe over at Instructables.com or by clicking this link - http://www.instructables.com/id/Brownies-Thick-Rich-Delicious/
February 13, 2016
Candy Hearts - Valentine Candy
When I was a little girl I always looked forward to getting those
tiny boxes filled with candy hearts (aka - candy conversation hearts) for Valentine's Day. I distinctly
remember the chalky hard texture that made them so enjoyable
They do take some patience as they have to dry for 48 hours!
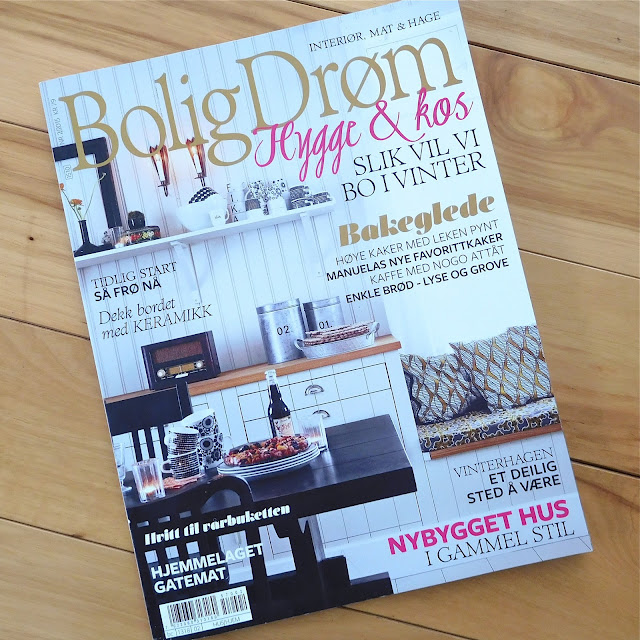
BoligDrom Magazine out of Norway found them delightful enough to write them up in an article! The entire magazine is, of course, in Norwegian, but I was still thrilled to see the hearts published!
1/4 c. Clear Soda, of your choice
3 c. Powdered Sugar
Food Coloring
Flavored Extracts
For complete instructions (with photos) click HERE.
In a small mixing bowl dissolve gelatin in soda. After about 5 minutes, set the bowl over a pot of simmering water to melt the gelatin completely - until you can't see any granules.
Use a hand or stand mixer and mix in the powdered sugar 1/2 cup at a time. Keep adding the powdered sugar until you have stiff fondant-like dough. It will be somewhat sticky.
Turn
the dough out onto the counter top and knead until smooth adding more
powdered sugar if necessary. Divide dough into as many portions as you
would like colors/flavors.
Make a sort of bowl shape out of one of the pieces of dough. Pour in flavored extracts and add food coloring. I made my candy hearts peppermint-vanilla (light pink and dark pink hearts) and vanilla bean (white hearts). Knead in the colors and flavors until well combined. Taste a piece of dough and add more extract if there is not enough. :)
Roll the dough to about 1/4” thickness and cut out shapes using small cookie cutters.
**I like to use square wooden dowels as guides for my rolling pin to make sure the thickness is the same throughout. This will make drying even amongst all of the candy hearts.
Arrange the candies on a parchment lined baking sheet and let dry for 48 hours. I know this is a long time but it takes that long to get them hard. Flip the hearts over occasionally to assure even drying on both sides.
Once
the hearts are completely dry you can stamp them with what ever message
you would like. If the hearts are two-tones they are not dry yet.
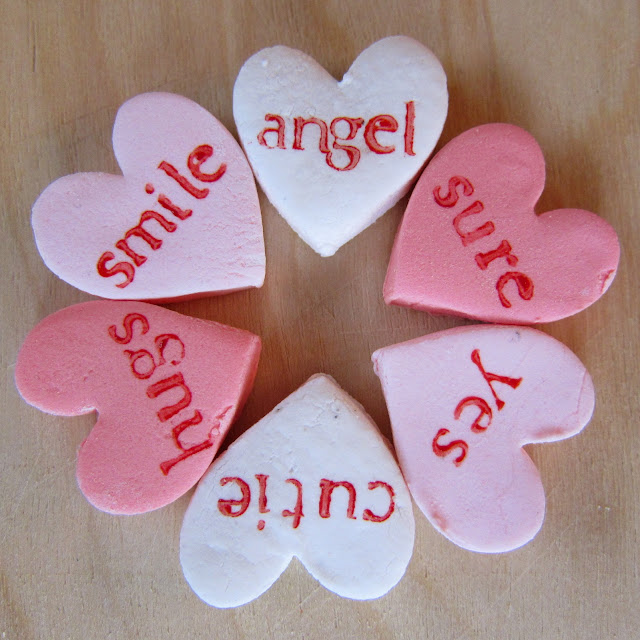
Using a clean and new paint brush spread a thin layer of food coloring onto a small saucer. Press small, clean and new letter stamps into the food coloring and stamp onto the hearts! Repeat until you have stamped all the messages you want. Let the food coloring dry before eating to avoid red lips and tongue!! :P
How to Make Candy Hearts:
Making candy hearts turned out to be much easier than I had anticipated. If you have ever worked with or made fondant it is a very similar texture but dries much faster. I was amazed that the flavor and texture was almost identical to the store bought candy hearts. I made my hearts a little bigger than the real thing to save some time and sanity! They are each about the size of a quarter.They do take some patience as they have to dry for 48 hours!

Candy Hearts Recipe
3/4 t. Powdered Gelatin1/4 c. Clear Soda, of your choice
3 c. Powdered Sugar
Food Coloring
Flavored Extracts
For complete instructions (with photos) click HERE.
In a small mixing bowl dissolve gelatin in soda. After about 5 minutes, set the bowl over a pot of simmering water to melt the gelatin completely - until you can't see any granules.
Use a hand or stand mixer and mix in the powdered sugar 1/2 cup at a time. Keep adding the powdered sugar until you have stiff fondant-like dough. It will be somewhat sticky.
Make a sort of bowl shape out of one of the pieces of dough. Pour in flavored extracts and add food coloring. I made my candy hearts peppermint-vanilla (light pink and dark pink hearts) and vanilla bean (white hearts). Knead in the colors and flavors until well combined. Taste a piece of dough and add more extract if there is not enough. :)
**I like to use square wooden dowels as guides for my rolling pin to make sure the thickness is the same throughout. This will make drying even amongst all of the candy hearts.
Arrange the candies on a parchment lined baking sheet and let dry for 48 hours. I know this is a long time but it takes that long to get them hard. Flip the hearts over occasionally to assure even drying on both sides.
Using a clean and new paint brush spread a thin layer of food coloring onto a small saucer. Press small, clean and new letter stamps into the food coloring and stamp onto the hearts! Repeat until you have stamped all the messages you want. Let the food coloring dry before eating to avoid red lips and tongue!! :P
Link for detailed Candy Hearts instructions below:
You can find detailed step-by-step instructions on how to make these lovely candy conversation hearts at http://www.instructables.com/id/Homemade-Candy-Conversation-Hearts/ or by clicking HERE.
Subscribe to:
Comments (Atom)


